Mutable Instruments Clouds is a granular audio processor. It creates textures and soundscapes by combining multiple overlapping, delayed, transposed and enveloped segments of sound taken from an audio recording buffer. The unique focus of Clouds is on real-time processing and manipulation of streaming audio, rather than playback of pre-recorded samples. This means that Clouds continuously records incoming audio through its inputs into the audio buffer, which can be up to 8 seconds long (by using the reduced audio quality setting). This limitation of the original hardware has been kept in the Softube Modular version in order to ensure a one-to-one hardware-software compatibility and similar user experience. The Softube Modular version of Clouds is based on firmware revision 1.31.
Using this continuously recorded audio, Clouds synthesizes a sonic texture by playing back short, overlapping segments of audio – also known as grains – extracted from it.
One could describe Clouds as a vessel with an audiostream running through it, featuring a tap that drips audio droplets out of the vessel for us to listen to. The tap sets the pace at which the audio droplets are dripping out this vessel. The pace is however also controlled by the size of each drop.

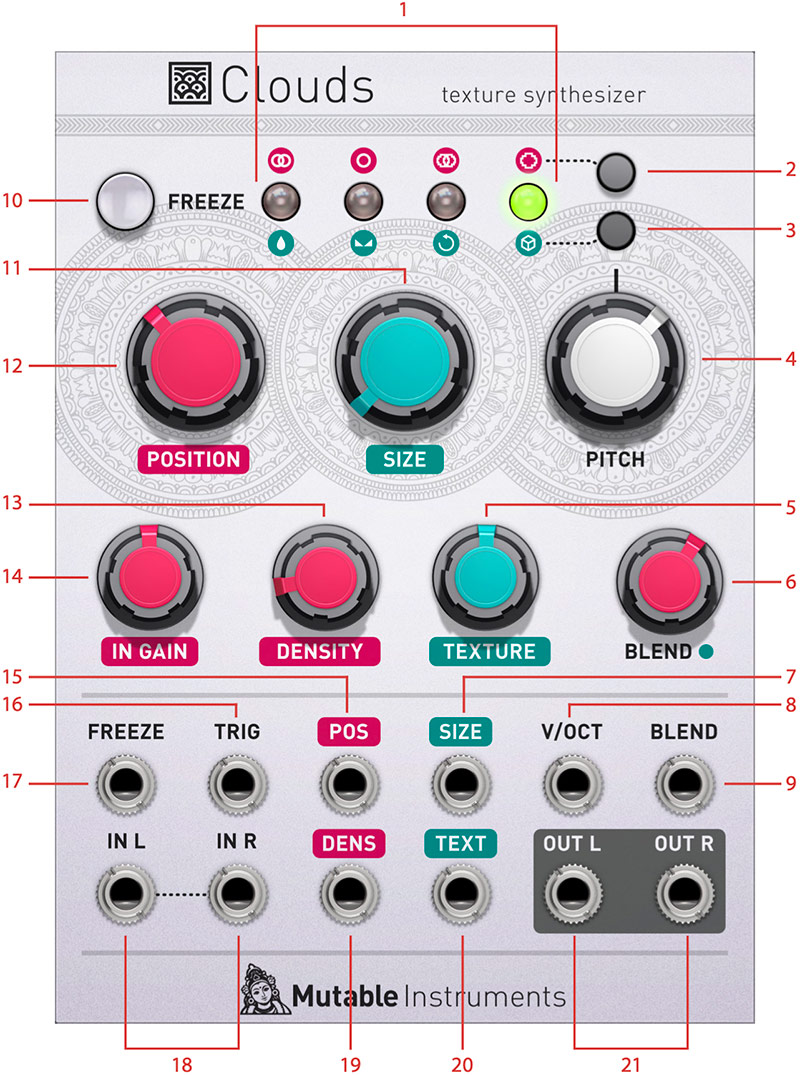
Click here to view the full-sized image in a new tab
- LED meters
- Audio quality selection button
- Blend mode selection button
- Pitch knob
- Texture knob
- Blend knob
- Size CV input
- V/Oct CV input
- Blend CV input
- Freeze push button
- Size knob
- Position knob
- Density knob
- Input gain knob
- Position input
- Trig input
- Freeze gate input
- Left and right audio input
- Density CV input
- Texture CV input
- Left and right outputs
Freezing, fragmentation and dissolution of the instantly unexpected is the way of Clouds, rather than the careful planning of what might very well not come. Have fun!
Getting started with Clouds:
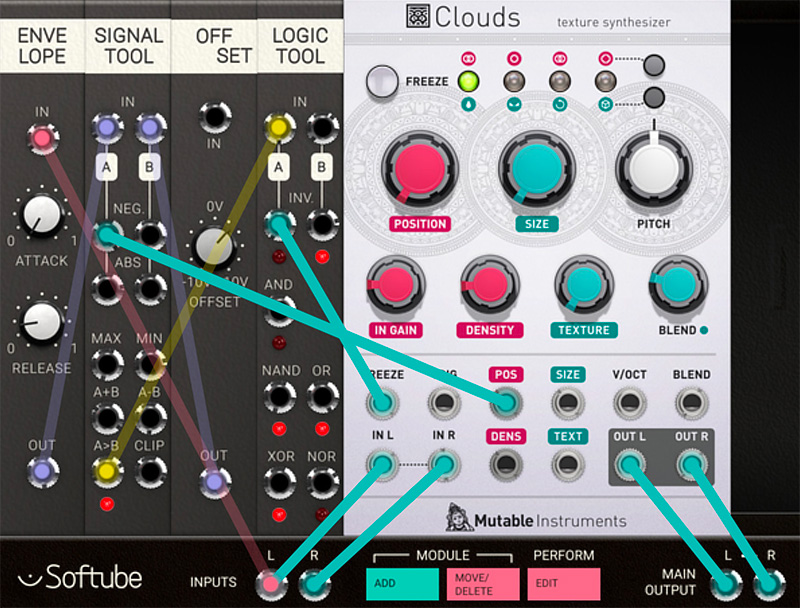
1. A great way of understanding how Clouds works is to run a well known and easily recognisable piece of audio through it. Try for instance using a drum/instrument loop on an audio track in your DAW. Use Modular FX loaded as an audio insert effect on your track and route audio through Clouds in your virtual rack. You should now hear an eerie, ghost-like version of your audio loop playing through Modular FX and Clouds when you hit play in your DAW.
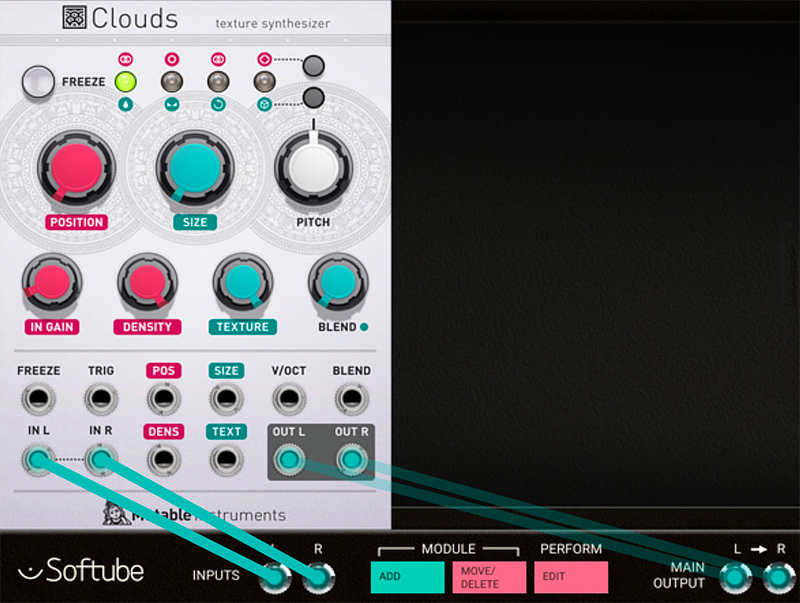
2. Try adjusting the Density knob of Clouds slowly from fully clockwise, via the 12 o’clock position, to fully counterclockwise while your loop is playing. Notice that the sound seems to “break up” and become silent around the 12 o’clock position, and then resume on the far side as you keep turning the knob. This is because Density controls the speed at which Clouds is playing back sample “grains” from the audio-stream that is being fed through the module.
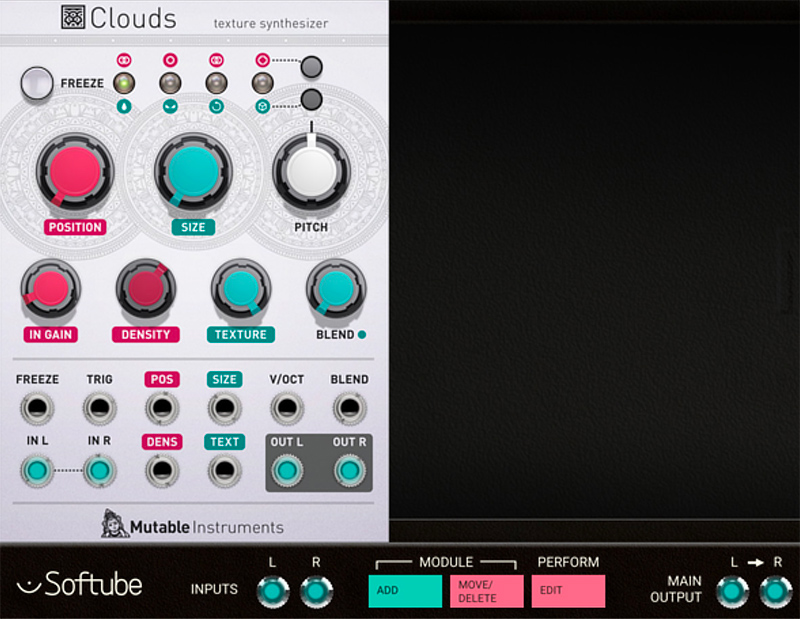
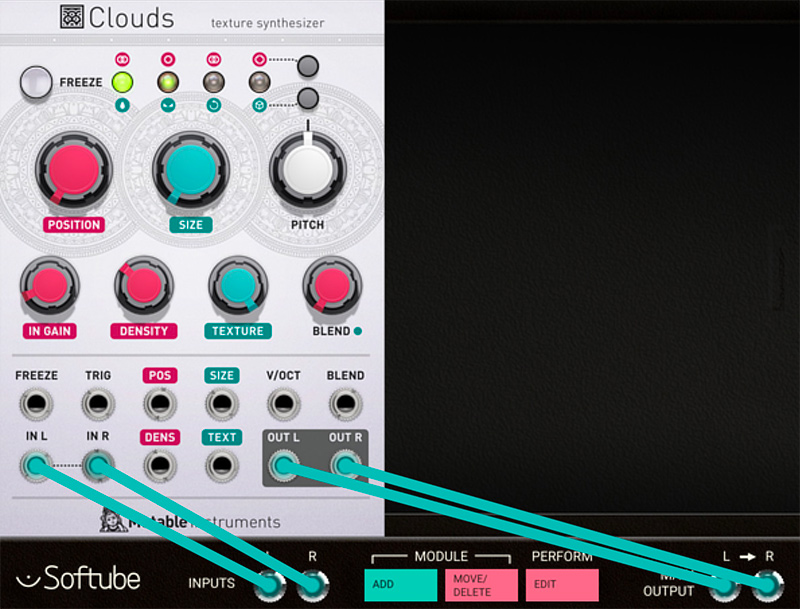
7 o’clock to 12 o’clock positions on the Density knob plays back the audio at a regular pace which decreases the further towards the 12 o’clock position we get.
On the far side, 12 o’clock to 5 o’clock positions, the audio is played back at an irregular pace, starting slow around 12 o’clock and getting increasingly more rapid as we turn the Density knob towards the end-position, 5 o’clock.
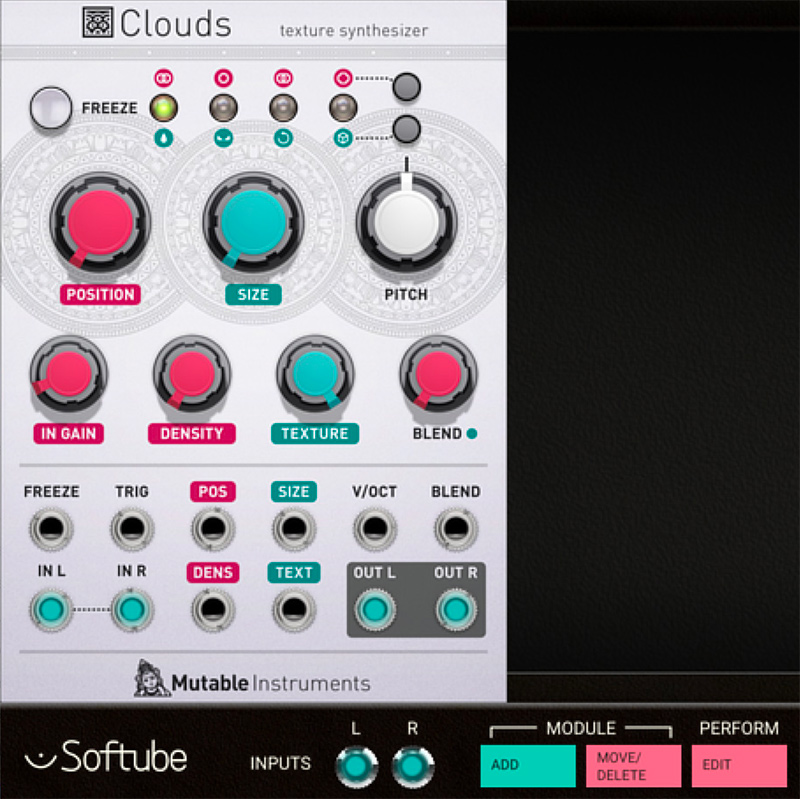
3. Now try adjusting the Texture knob from the end position, fully clockwise, slowly over to fully counterclockwise. Notice how the sound character changes. This is because of the different volume envelope applied on each grain. While the envelope at fully clockwise (Hann window) is smooth, the envelopes at 12 o’clock (triangle) and at the fully counterclockwise position (square) sound more harsh. This is extra obvious when the Density knob is set to one of the slower rates (regular or irregular) around 12 o’clock.
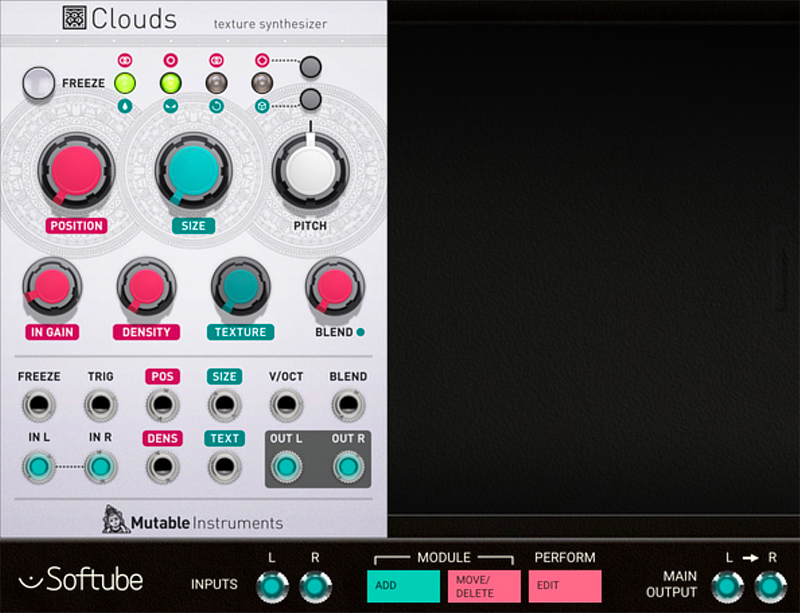
4. Now try clicking on the Freeze button. It will light up green and the audio-stream through Clouds will remain frozen until the Freeze button is clicked again (or CV turns it off via the Freeze CV In jack; more on this later).
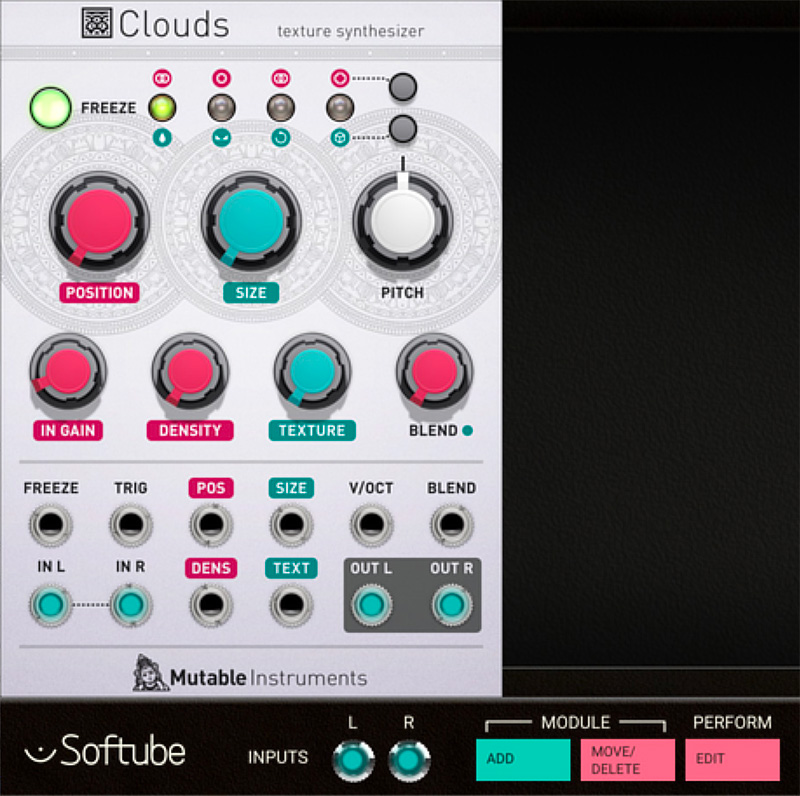
When Clouds is in its Freeze state, try “audioscrubbing” through the frozen audio buffer with the Position knob. Find a start of a drumbeat or any other percussive sound in your frozen audio.
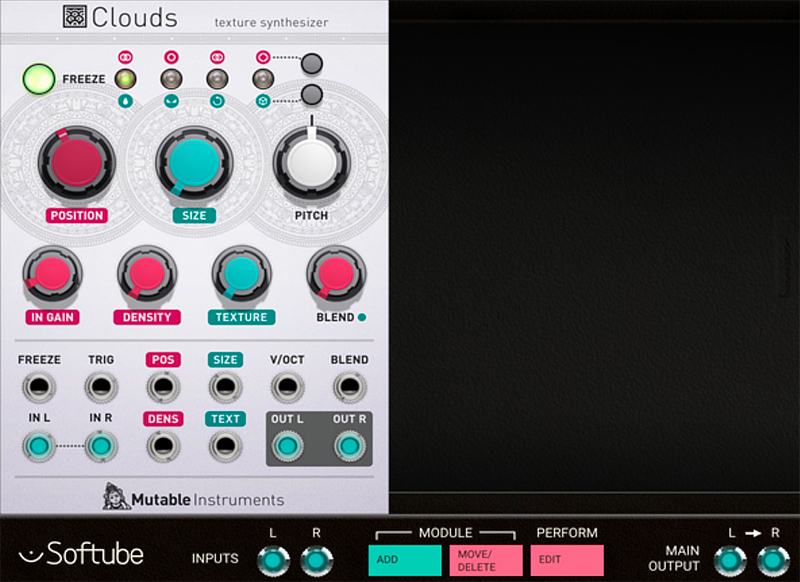
5. Now, reduce the pace at which the sampled “grains” are played back again by setting the Density knob to around 10 o’clock. You should now hear a steady pulse of audio grains played back. Try adjusting the Size knob. You’ll notice that Size not only affects the length of the played back grain, but also the pace at which it is played back. Try also adjusting the Pitch shift knob. This shifts each grain up or down 2 octaves from the original pitch (at the 12 o’clock position).
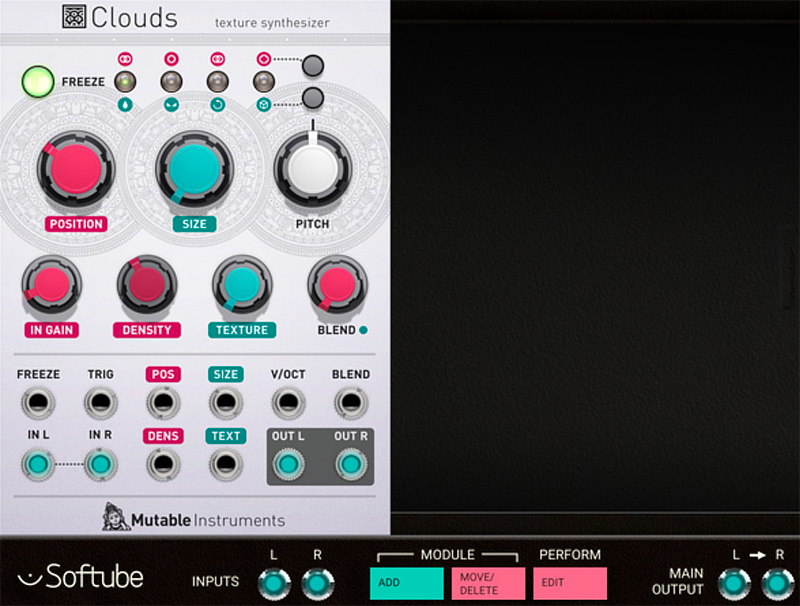
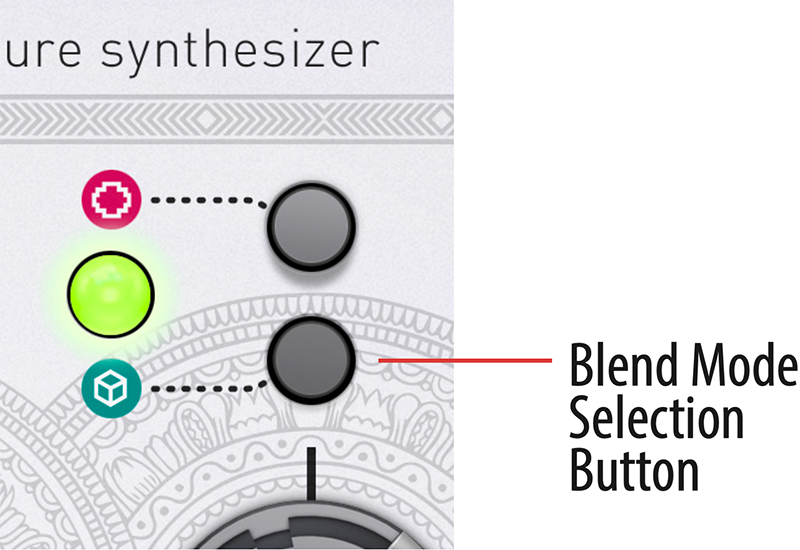
6. OK. Next let’s look at the Blend modes. Unfreeze Clouds by clicking on the Freeze button again and you will hear your DAW-loop playing through Modular FX and Clouds again. By clicking on the lower button to the right of the LED row you will cycle which Blend mode is active. Select the Blend mode furthest to the left with the drop symbol; the Dry/Wet mode. You’ll notice that the Blend knob on the lower right on the Clouds module will change color to white and knob position is set to fully clockwise. This means that the Blend VC Dry/ Wet parameter is currently set to fully wet mode. Tweak the Blend knob gradually to fully counterclockwise to only hear the dry signal. Notice that the LED above the currently selected Blend mode changes color from unlit to green and then over yellow, to red at the Blend knob set to a fully clockwise position. The color will then always be reflected whenever tweaking the Blend knob regardless of which mode that is currently selected. In this way, you can always keep track of the four different Blend parameters current value when tweaking one. At VC Dry/Wet set to 12 o’clock you will hear both dry and wet signals at the same time and notice that there’s a slight delay between the two. This is normal and the same behavior as in the original hardware. With the Pos knob you can set where in the audio buffer Clouds will playback of sampled grains, effectively creating a delay between recorded and played back audio. If a CV source is inserted to the Blend CV input, it will add to and control the currently selected Blend Mode parameter.
7. Let’s move on to the next Blend mode, the VC Stereo Spread, indicated below the second LED from the left by a stereo image symbol. By repeatedly clicking on the Blend mode selection button until the second LED from the left is lit green, the VC Stereo Spread mode is selected. This is also indicated by the color of the Blend knob (now red) and the new position of the knob to reflect the current value of VC Stereo Spread. This parameter determines the stereo spread of each played back sampled grain, i.e. the stereo width of Clouds. Set the Blend knob all the way counterclockwise for fully mono output on the left and right outputs, or all the way clockwise for extreme stereo spread of each grain.
8. The third Blend mode, indicated below the third LED from the left by a curling arrow symbol, is VC Feedback. This parameter determines how much of the the output signal will be fed back into the input audio stream. Be careful with applying too much feedback as it is easy to get loud output from Clouds when the feedback starts building. When in Freeze mode this parameter changes to a kind of additional reverb control (for more information see detailed description below).
9. The last Blend mode is VC Reverberation. It is indicated below the fourth LED from the left by a box symbol and set how much internal reverb is applied to Clouds output.
Tip: Use performance module linking to gain easy access to all four Blend parameters at the same time.
Note: Since Clouds is essentially a digital module, it induces some latency to its processed signals. Time critical elements processed through Modular FX and Clouds will appear “out of sync” if not compensated for beforehand.
Parameters
Freeze Push-Button: When this button is engaged (is lit), Clouds “freezes” the audio buffer held in memory and the current grain will continuously loop until the freeze button is dis-engaged again by pressing it a second time. During freeze all Clouds' controls will work as normal with all functions now applied to the grain “loop”. Only two functions will be different: Input Gain will not affect the currently playing grain “loop” since it only controls incoming audio level. Also Feedback function will be given a different function since feedback can no longer occur in the recording buffer (because it is frozen). Instead, the output signal is routed through delays and all-pass filters to get the feedback build-up to occur in this extra recording space, giving the sound a very reverb-like nature.
Audio Quality Selection Button: This button toggles between the four different sound-qualities in Clouds: 16 bit stereo, 16 bit mono, 8 bit stereo and 8 bit mono. The current mode will be displayed briefly on the 4 LED bar by a red indication below the currently selected mode symbol (displayed above the 4 LED bar). Clicking on the rose symbols above the LED indicator bar will also swiftly change between each of the blend modes. Note that Clouds’ 8-bit has a lovely flavor of 8-bit μ-law companding which make it sounds like a cassette with less hiss, but more distortion.
Blend Mode Selection Button: This button determines the current state of the Blend knob and input jack. Clicking on this button enables the user to toggle between (from left to right) VC Dry/wet mode, VC Stereo Spread, VC Feedback and VC Reverberation mode. The current mode will be displayed briefly on the 4 LED bar by a green indication above the currently selected mode symbol (displayed below the 4 LED bar). Clicking on the green symbols beneath the LED indicator bar will also swiftly change between each of the blend modes.
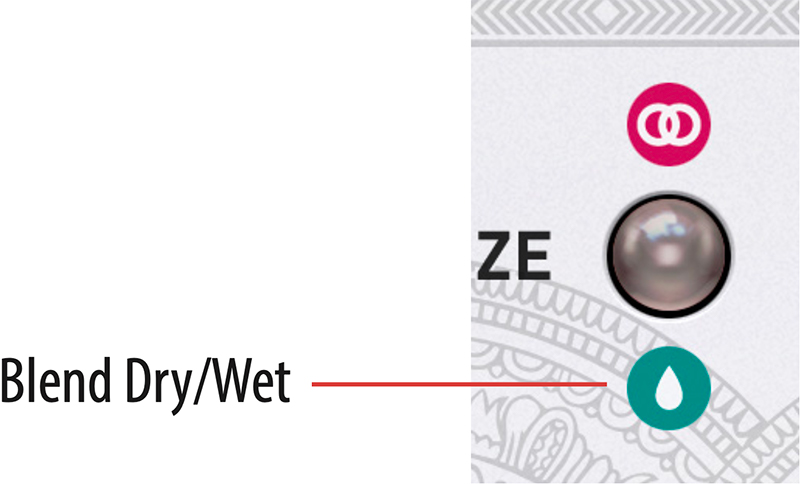
VC Dry/Wet Balance Mode: When VC Dry/wet balance mode is selected, the Blend knob (and the input CV at the Blend input CV jack) sets the balance between the dry and wet signal, ‘dry’ being the unaffected portion of the sound fed through Clouds, and ‘wet’ being the affected signal.
VC Stereo Spread: When VC Stereo Spread mode is selected, the Blend knob (and the input CV at the Blend input CV jack) will determine how each grain is distributed in stereo. In VC Stereo Mode, turning the Blend knob clockwise will “widen” the stereo output of the Clouds.
VC Feedback: As VC Feedback mode is selected, the Blend knob (and CV input at the Blend jack) will set the internal feedback of Clouds. Depending on the settings of other parameters of Clouds such as Size, Density and Pitch, this feedback will be more or less harsh. Be careful though – it is quite easy to get Clouds feedback to self-oscillate which causes internal distortion. When the Freeze function is engaged, the VC Feedback can no longer occur in the recording buffer (it is frozen) and thus feedback changes function to a kind of additional reverb control.
VC Reverberation: In VC Reverberation mode the Blend knob (and the input CV at the Blend input CV jack) will control how much signal is fed into Clouds’ built-in reverb. The Blend knob set fully clockwise in VC Reverberation mode will generate a very “wet” and long reverb tail.
Position Knob: With the position knob, you will select from which part of the buffer the grains are taken, i e setting the starting-position from which the sample-grain are being played back in Clouds. If you change this knob while Clouds is processing sound that goes through, you will hear the played back audio affected in different ways. In Freeze mode, turning this knob will scrub the grain sample buffer back and forth while audio is played back.
Size Knob: This knob sets the size of the played back grains. With this knob turned all the way counterclockwise, grains will be very tiny and sound metallic depending on what settings the density and texture knobs are set to. Turning the Size knob clockwise while sound is played back can result in cool “time-stretched” effects. Of course a motion similar to this can be automated through the size CV inputs.
Pitch Knob: With the Pitch knob each played back grain can be played back at a different pitch and, by the nature of Clouds, the pitch-shifted signal will still retain its tempo and timing. Slightly pitch-shifting each grain is also extra apparent when using feedback. The fully counterclockwise position gives a minus 24 semi-notes (two octaves) down transposition, while fully clockwise transposes each grain 24 seminotes (two octaves) up.
Input Gain Knob: This knob sets the attenuation of the signal at Audio in jacks. Fully counterclockwise, signal will be completely silent. Watch the LED meters to monitor the input signal so that it's not distorting while being fed through Clouds.
Grain Density Knob: This control sets Clouds internal playback density and behavior of the played back grains. If this knob is at 12 o'clock, nothing will be heard at all since the playback density of grains will be set to none. Twist the knob slowly fully counterclockwise to get more dense, regularly played back grains with a constant, high rate. Or twist the knob slowly fully clockwise to increase density but with irregular playback, which sounds different and smoother than constant rate.
Texture Knob: This knob sets each audio grains volume envelope. In the fully counterclockwise position, the envelope curve is very step and will give a harsh sound to Clouds, especially when the Density knob is set high (fully clockwise or counterclockwise). At twelve o’clock, the Texture knob gives each grain a more sloped and softer triangular shape and at the fully clockwise position a Hann window shape – a raised cosine distribution is used. The latter gives Clouds a blurry, pleasant sounding texture when played back.
Blend Mode Knob: This knob controls one at a time, the parameters determined by Blend mode button selection: VC Dry/wet balance, VC Stereo Spread, VC Feedback or VC Reverberation (see full description above at Blend Mode selection).
Indicators
Freeze Button LED: When the Freeze Button LED is lit, Clouds does not stream audio through it, but merely plays back what's currently in the audiobuffer.
Meters (4 multicolor LED bar): This bar of four multi-colored LEDs have different display functions. By default, it displays input level by lighting one LED after another from left to right. Adjust your input level by turning the In Gain knob until two or three LEDs remains more or less constantly lit (on sounds with an even sound level).
When the Audio Quality Selection button is clicked the LED meter bar will briefly show which audio quality is selected by a red LED indication. Red LED meaning (from left to right): 16 bit stereo, 16 bit mono, 8 bit stereo and 8 bit mono.
When the Blend Mode Selection button is clicked in order to change Blend mode, the LED meter bar will briefly show which mode is selected at the moment by a green LED indication.
When the Blend knob is moved, the LED at the position of the selected parameter will change color from none to green, over via yellow to red to indicate increased parameter value. The current values of the other Blend values will also be reflected by their LED colors at the same time.

Inputs
Freeze Gate Input Jack: When a high (+5V DC signal) appears on the Freeze Gate input jack, Clouds will “freeze” the audio buffer and hold it in memory until the input jack goes low again. If the freeze button is engaged at the same time, it's current state will override the input CV of this jack.
Trig Input Jack: When a trigger appears at the Trig input jack Clouds will trigger and play a grain, regardless of the density setting. This means that it is possible to trigger a short snippet of a “sampled” sound that is currently in the buffer while using another CV to sweep through the position in the buffer (see below).
Position CV Input Jack: CV input into this jack mirrors the function of the Position knob. This means that you sweep the playback position of the audio buffer memory in real-time while audio is streaming through, or when in “freeze mode”.
Size CV Input Jack: This jack controls the played back size of the sample grains and mirrors that of the Size knob. Very cool time-stretch effects can be achieved by CV modulating this input, changing the parameter during playback.
V/Oct CV Input Jack: CV input jack to control the pitch transposition at 1 Volt per octave. This jack adds to the function of the Pitch knob, which works as an offset in relation.
Blend CV Input Jack (Controls The Currently Selected Blend Parameter): This jack controls the currently selected Blend parameter: VC Dry/ wet mode, VC Stereo Spread, VC Feedback or VC Reverberation mode.
Audio In Left: Left input jack for Stereo audio input.
Audio In Right: Right input jack for Stereo audio input. This jack is normalized to Left input if no cable is inserted here (i.e. mono in).
Density CV Input Jack: CV input jack to mirror the Density knob control.
Texture CV Input Jack: CV input jack that mirrors the Texture knob control.
Outputs
Audio Out Left: Left output jack for Stereo audio output.
Audio Out Right: Right output jack for Stereo audio output.
The Clouds module can be used in many interesting ways. Here’s some suggestions:
Sampler
One of the coolest uses of Clouds in Modular is to use it as a kind of crude sampler. Use Modular FX to record your prefered sound into the sample buffer, freeze, set density to 50%(12 o’clock) and use the trig input to trigger individual grains. Use the Pos knob to scrub the buffer back and forth, and find the part of the Sample you want to play back. By adjusting the size from fully counterclockwise (only one sample grain played back) to full clockwise, the whole sample buffer can be played back from the start position set by the pos knob.
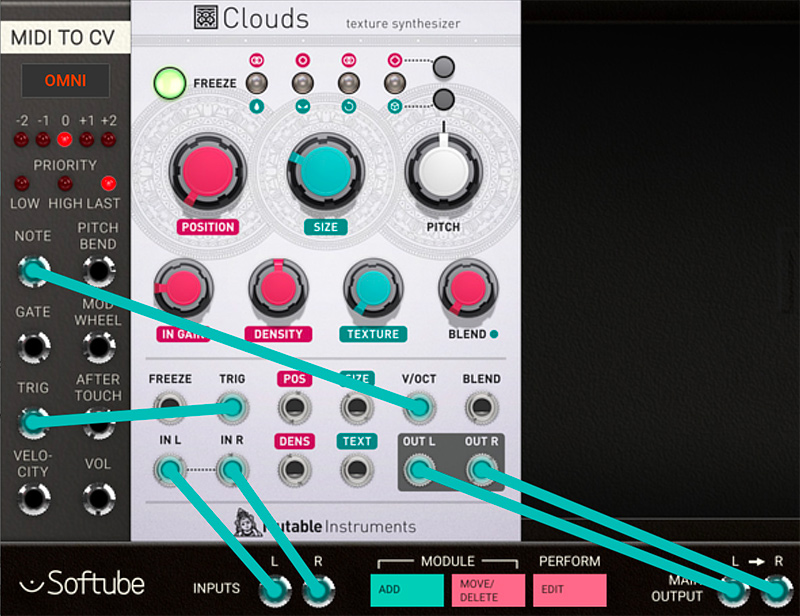
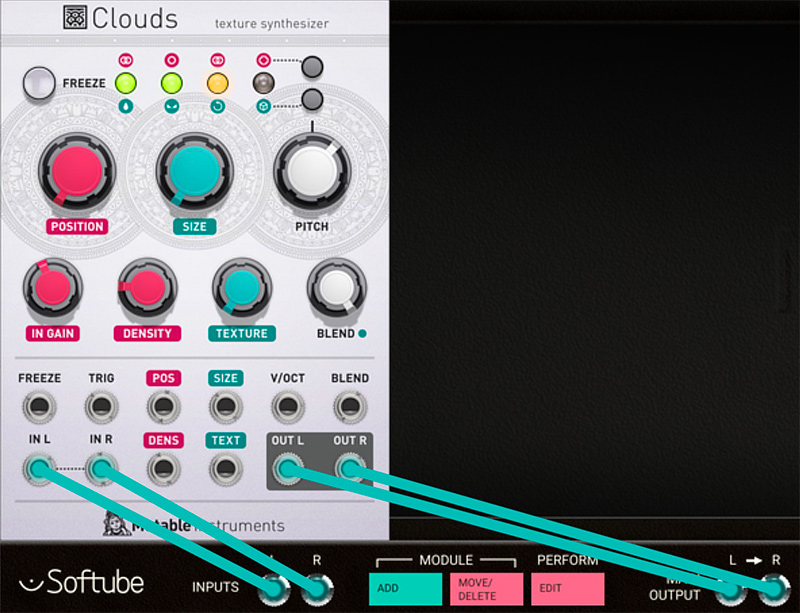
AM – RM kind of effect
By setting the Density knob at roughly 9 o’clock and Texture knob fully counterclockwise, the signal through Clouds take on a gritty tone. Now adjust the pitch knob to some odd ratio for clangorous rich ring-mod type sounds.
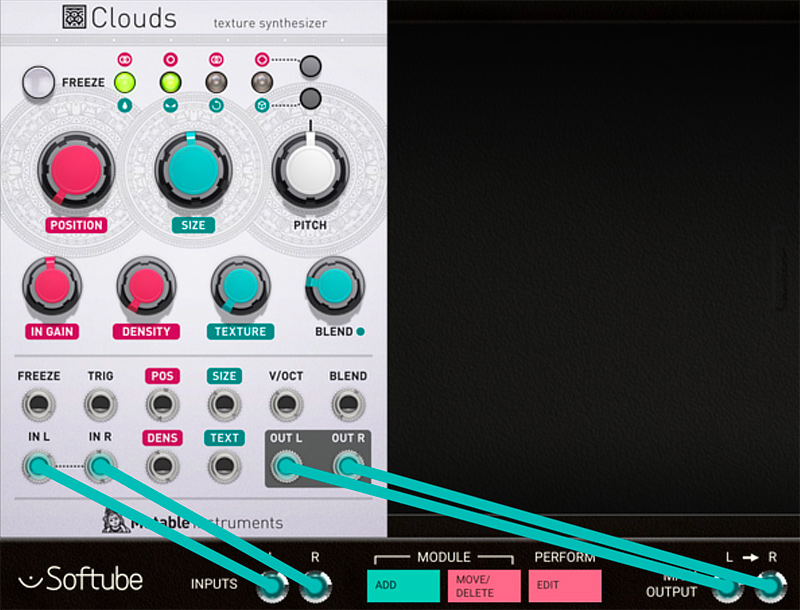
Delay
Using Clouds with full regular Density and Texture at fairly square (both knobs at fully counterclockwise), it can be used for some fairly straightforward delay-duties. Adjusting Size changes delay time and adjusting Blend feedback - you guessed it - delay feedback. Set the balance between the dry signal and the delayed signal with Blend Dry/Wet.
Pitch-shifter
This is a bit trickier. Since Clouds is not specifically made for pitch-shifting, different harmonic material requires slightly different Texture and grain Size settings for optimal pitch shifting duties. This is also depending on the ratio required - it is easier to achieve perfect one octave up or down pitch shifting with Clouds than for example a clean +7 semitones pitch shift. Experimentation is the key here.
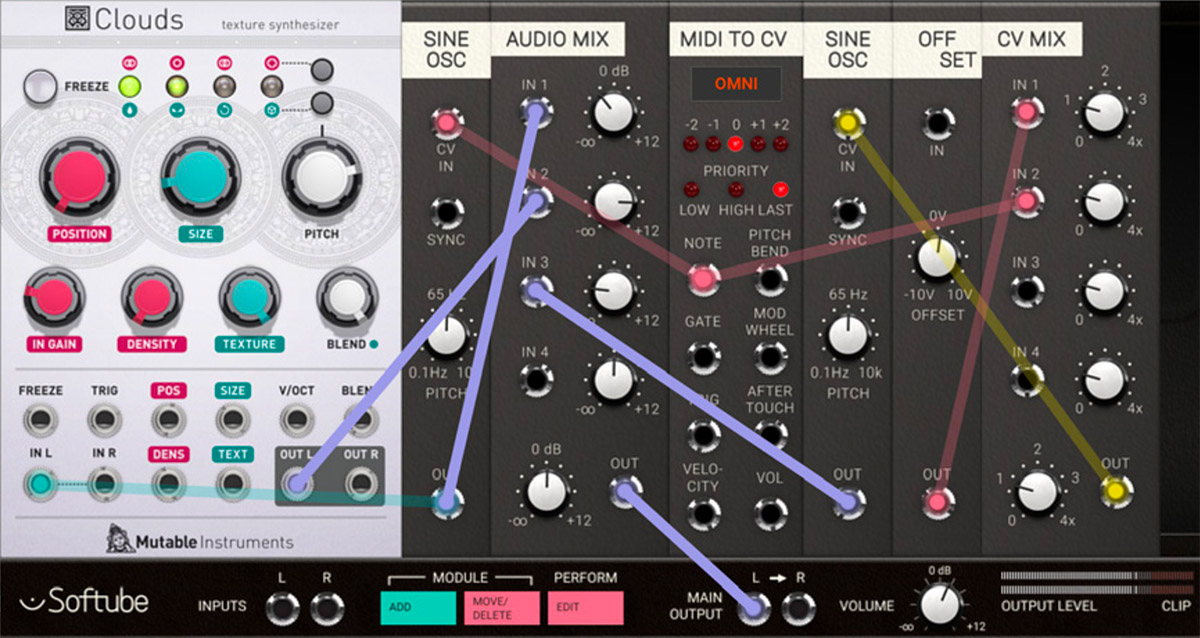
Time-stretch
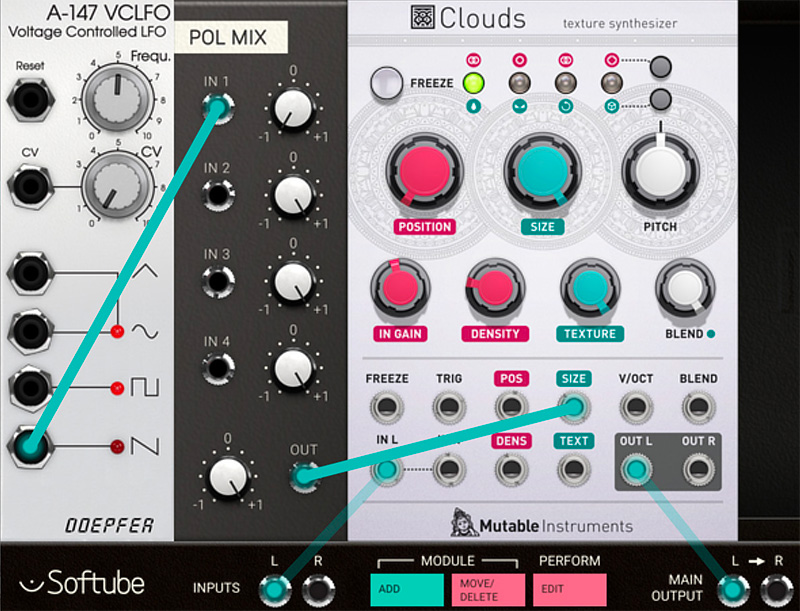
By modulating the size CV input with an lo frequency rising sawtooth wave with roughly the same speed as the played back audio through Clouds, a time-stretch kind of effect can be achieved.
Robotize
By automatically trigger freeze Clouds audio buffer, a cool “robotizer” effect can be constructed. This works exceptionally well on beats and rhythm material.
Eric Hampusgård – Programming, modeling
Émilie Gillet – Original code, feedback
Kristofer Ulfves – Project management, presets, validation, user manual
Oscar Öberg – Mentoring
Arvid Rosén – Programming, mentoring
Igor Miná – User manual layout, hardware photos
Bitplant – GUI graphics
Tomas Bodén – Presets
Robin Rimbaud – Presets