User Manual
Spring Reverb For Modular
Intro
Overview
Description
The Spring Reverb module in use
Credits
Back in the 1930s, Laurens Hammond had started developing and selling his now famous Hammond electro-mechanical Organ. While he had bought a small church organ, having it installed in his living room, he soon found out that it didn’t sound as impressive without the reverberation of the church hall. To cure this, he borrowed technology from Bell Labs who had developed a device to emulate the artificial delay in long-distance calls using wire and springs. Hammonds new tweaked version of Bell Labs device was the first real artificial reverberation unit and it was huge. Eventually, in the 1960s, the spring reverb units had shrunk enough to fit into guitar amplifiers and so they also were incorporated in the early synthesizers such as the EMS VCS3 (1969), ARP 2600 (1971) and Buchla Music Easel (1973).
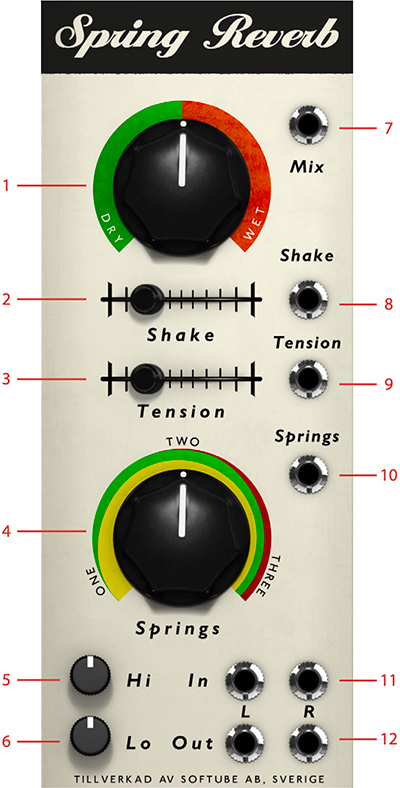
Click here to view the full-sized image in a new tab
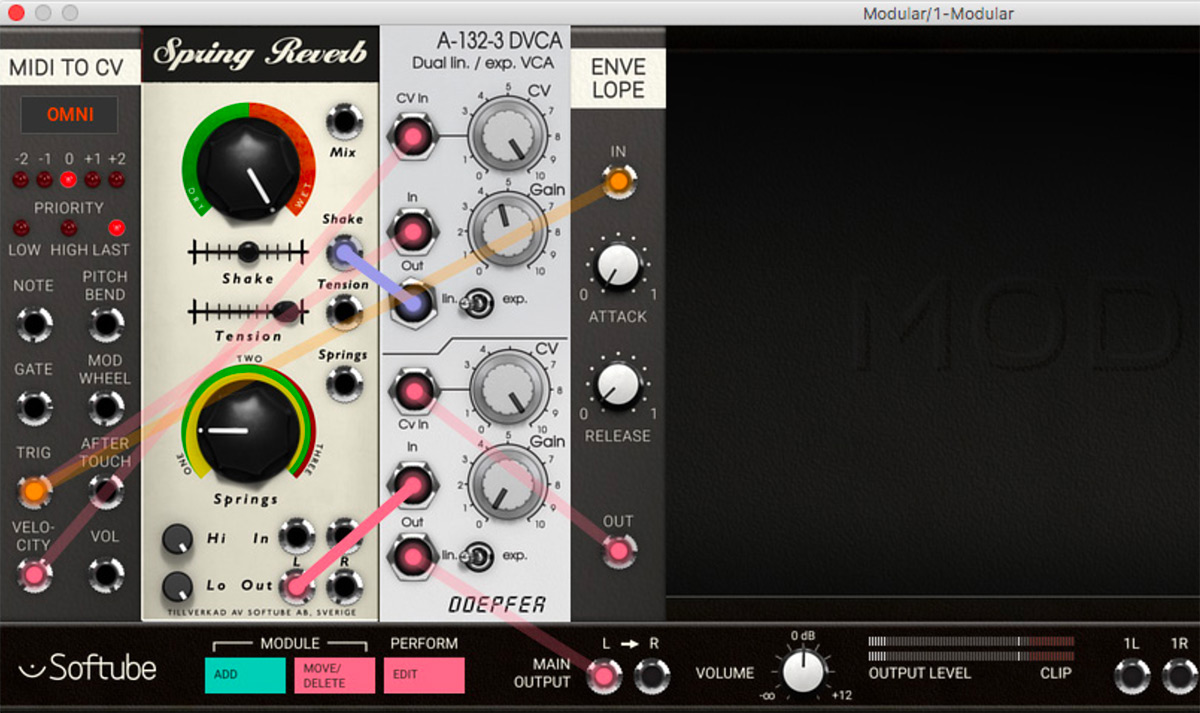
- Dry/Wet mix knob
- Shake slider
- Tension
- Springs
- Treble (Hi)
- Bass (Lo)
- Mix CV in
- Shake in
- Tension CV in
- Springs CV in
- Left and right inputs
- Left and right outputs
The Spring Reverb module for Modular is based on Softube's stand-alone native plugin and shares a lot of the same features. An addition to the Modular version is the CV control of all parameters. For more detailed information about Spring Reverb, see also its separate chapter.
Parameters
Dry/Wet Mix Knob: This knob will set the Dry vs Wet ration for your Spring reverb. For a fully wet signal, turn this knob fully clockwise.
Shake Slider: This slider emulates the spring tank being shaken or spring being struck resulting in a thunderous pleasant sound, just like a real spring tank would. When the slider is moved to a position other than halfway between far left and right, the reverb will go “sproing”. When the mouse button is released while adjusting this slider, it will automatically revert back to its middle position. Think of it as the slider having a spring-motion (pun intended).
Tension: By adjusting this slider the sound of the strings will change from slow and smooth (left) to quick and harsh (right). By setting this parameter differently, many sounds from different reverb tanks can be achieved just by changing the tension and the number of springs (see below). As a general rule, cheaper reverb tanks usually feature high tension and two springs, while a more expensive reverb tanks might feature three springs and a lower tension.
Springs: This knob controls the number of springs audible in the Springreverb. Fully counter-clockwise, only one spring will make sound, while at 12 o'clock two springs are audible, and finally at fully clockwise the sound of all three springs are mixed to the output.
Treble (Hi): This knob changes the high end equalization of the Spring reverb module output. Tweaking the treble knob clockwise will boost the top-end frequencies above 5 kHz of the wet portion, and tweaking the same knob fully anticlockwise will cut off some of the same top frequencies.
Bass (Lo): This knob changes the low end equalization of the Spring reverb module output. Tweaking the bass knob clockwise will boost the low-end frequencies below 70Hz of the wet portion, while tweaking the same knob fully anticlockwise will cut off some of the same sub frequencies.
Inputs
Mix CV In: This CV input controls the Dry/ Wet ratio for your Spring reverb and works with the Dry/Wet Mix knob as offset.
Shake In: CV input jack that activates the Shake function of the Spring Reverb when it exceeds 0v. Lower CV voltage fluctuations will result in minor “spring strokes”, while great leaps (gates etc) will create thundering spring noise-effects. This jack works in tandem with the Shake slider as offset.
Note: automating the shake slider from a performance module can slightly alter its functionality since the control will not have the spring function of the module’s own control.
Tension CV In: This CV input jack controls the tension of the springs. Swiftly modulating this input with a sine or triangle wave can create desirable chorus-like sounds.
Springs CV In: CV input jack with control over the output volume of the three springs. Low CV will output only one spring, while an increasing CV amount (up to 5V) will add the two other springs in the mix output.
Left In: This is the left audio input of the Spring Reverb.
Right In: This is the right audio input of the Spring Reverb. It is normalized to the Left audio input when it is not patch, which means that only connecting the Left input via a patch cord will enter mono audio through the Spring Reverb.
Ouputs
Left Out: The Left audio output of the Spring Reverb module.
Right Out: The Right audio output of the Spring Reverb module.
The Spring Reverb module in use
1. Use fast modulation of the tension input jack in order to get chorus-like sounds out of seemingly ordinary waveforms. Use this great trick to get animation and blurriness into your patches.
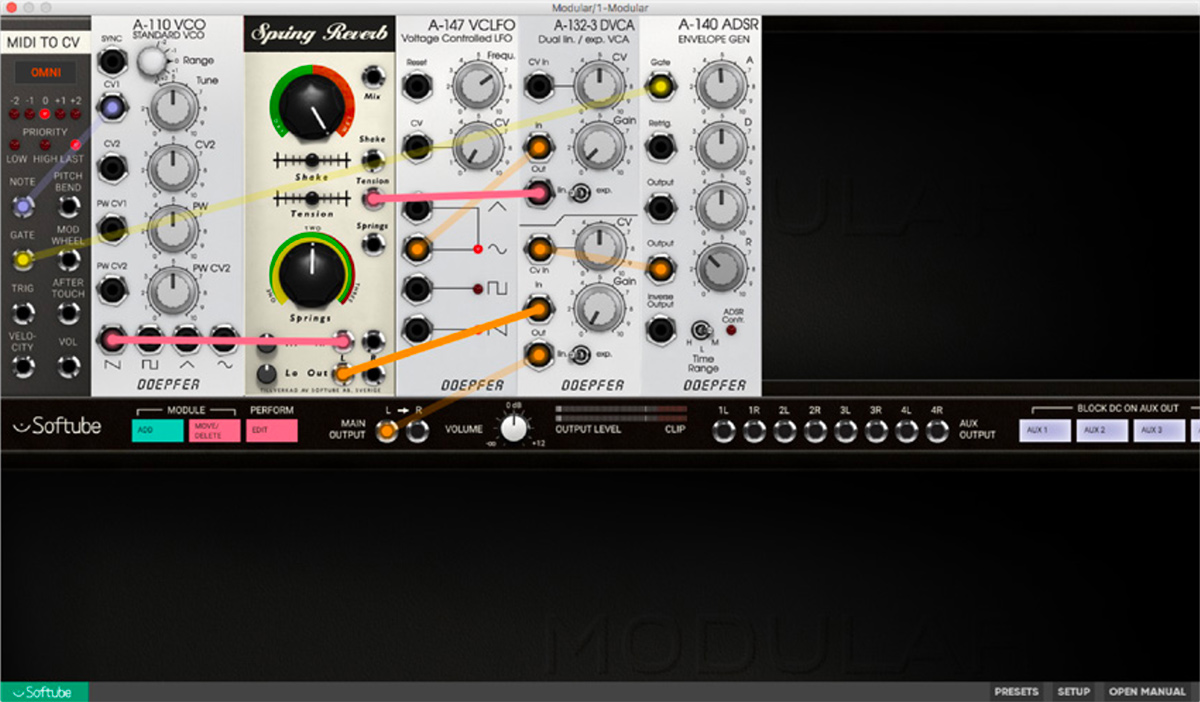
2. Using a the Spring Reverb in a controlled feedback loop can also create interesting sonic textures. Spring Reverb can be a bit sensitive, especially in higher frequencies; a good practise is to have an envelopefollower controlled filter or VCA in the feedback path along with the Spring Reverb. And by using the envelope follower to simultaneously control the tension of the Spring Reverb in the feedback path.
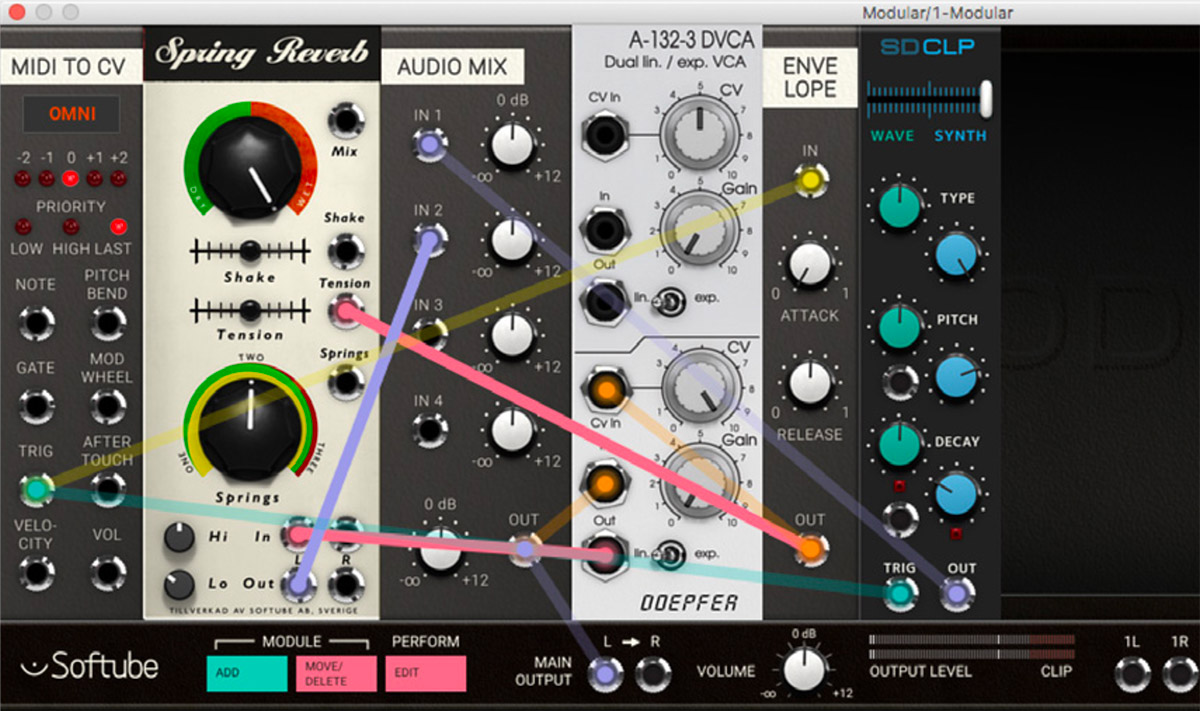
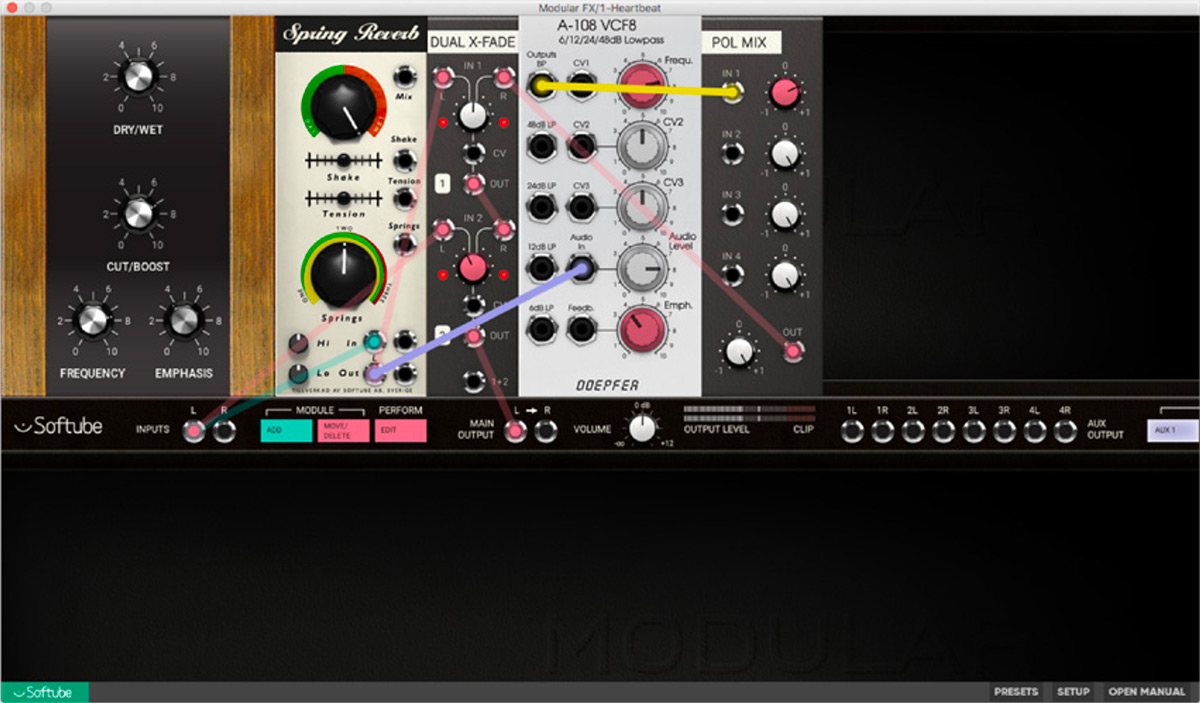
3. Another great way to customize your Spring Reverb sound is to use one or many bandpass filters as means of equalization of the output signal.
4. CV control of the Dry/Wet mix sequencer from a synchronised source such as a sequencer can also create cool jerky “frozen” beats reminiscent of 90s Big Beat fame.
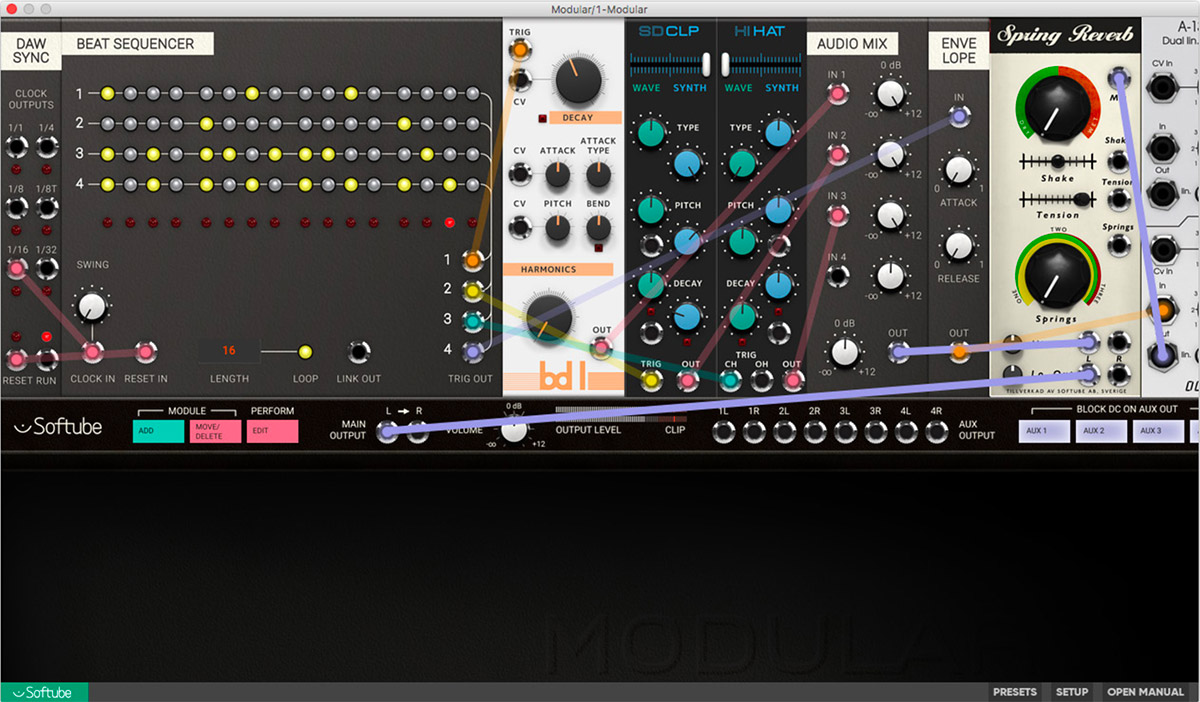
5. The shake trigger input can also be used creatively by varying the amplitude of the input CV or pulse you’re using, for example via velocity.
Peter Möller – Mathematical modeling
Torkel Svensson – Mechanical analysis
Oscar Öberg – Modeling and implementation
Niklas Odelholm – Framework programming and graphic design
Kristofer Ulfves – Project management, presets, validation, user manual
Igor Miná – User manual layout
Ulf Ekelöf – 3D rendering and graphics