User Manual
Amp Room ENGL Savage Mark II Suite
Getting started (quick start-manual)
Suite Gear
Foreword by Softube
A few words from the Amp Designer
Intro
Amplifiers
Cabinets
Pedals and Studio Effects
Credits
Related manuals
Getting started (quick start-manual)
Presets
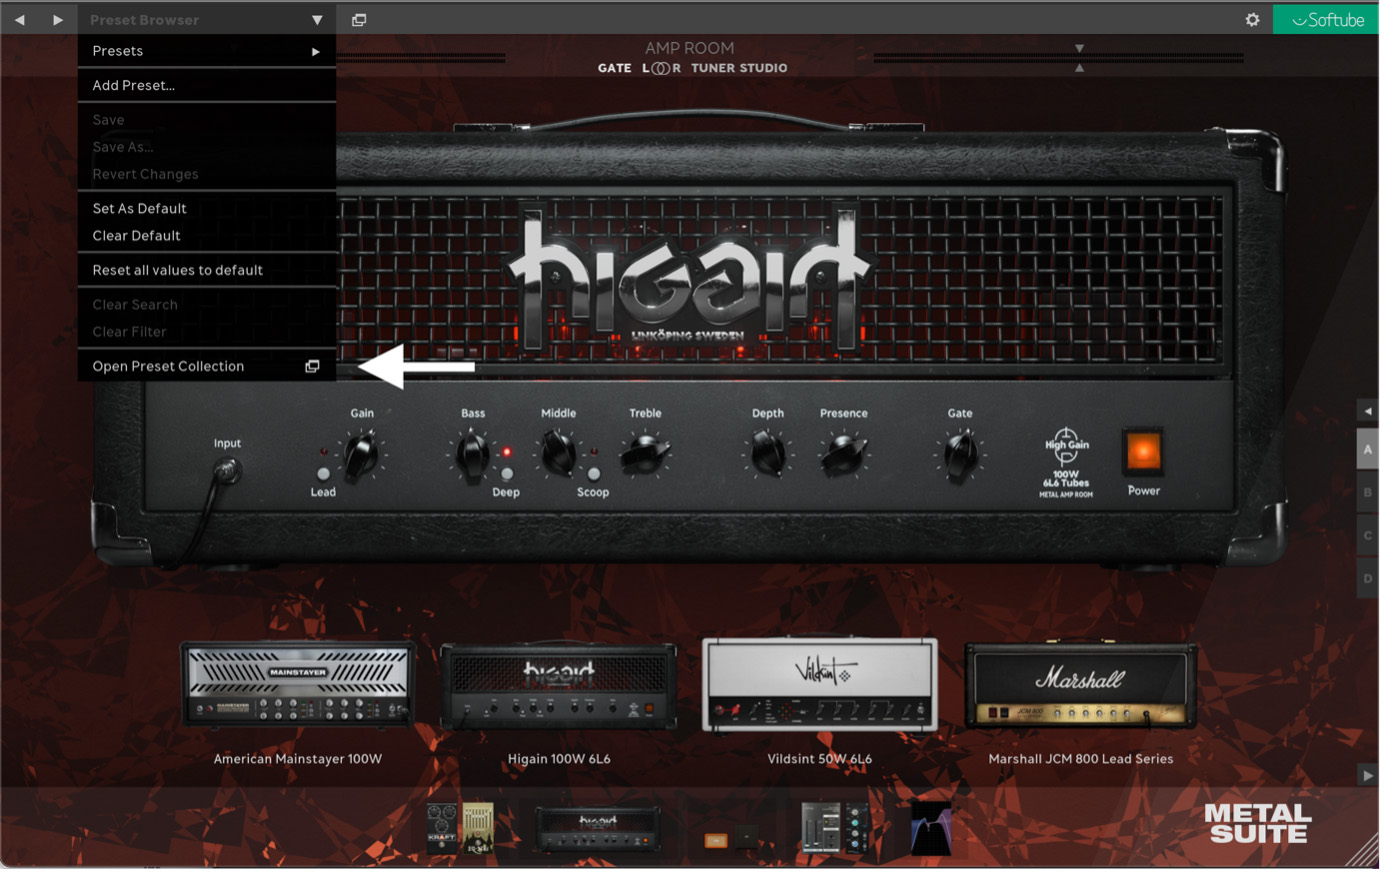
Amp Room factory presets are your friend for both quickly learning how Amp Room works and for finding great sounds fast. You can find factory and User presets both here:

And here. This will open Preset Collection in a pop-up window. See the Preset Collection manual for more information.
Switching between Suites
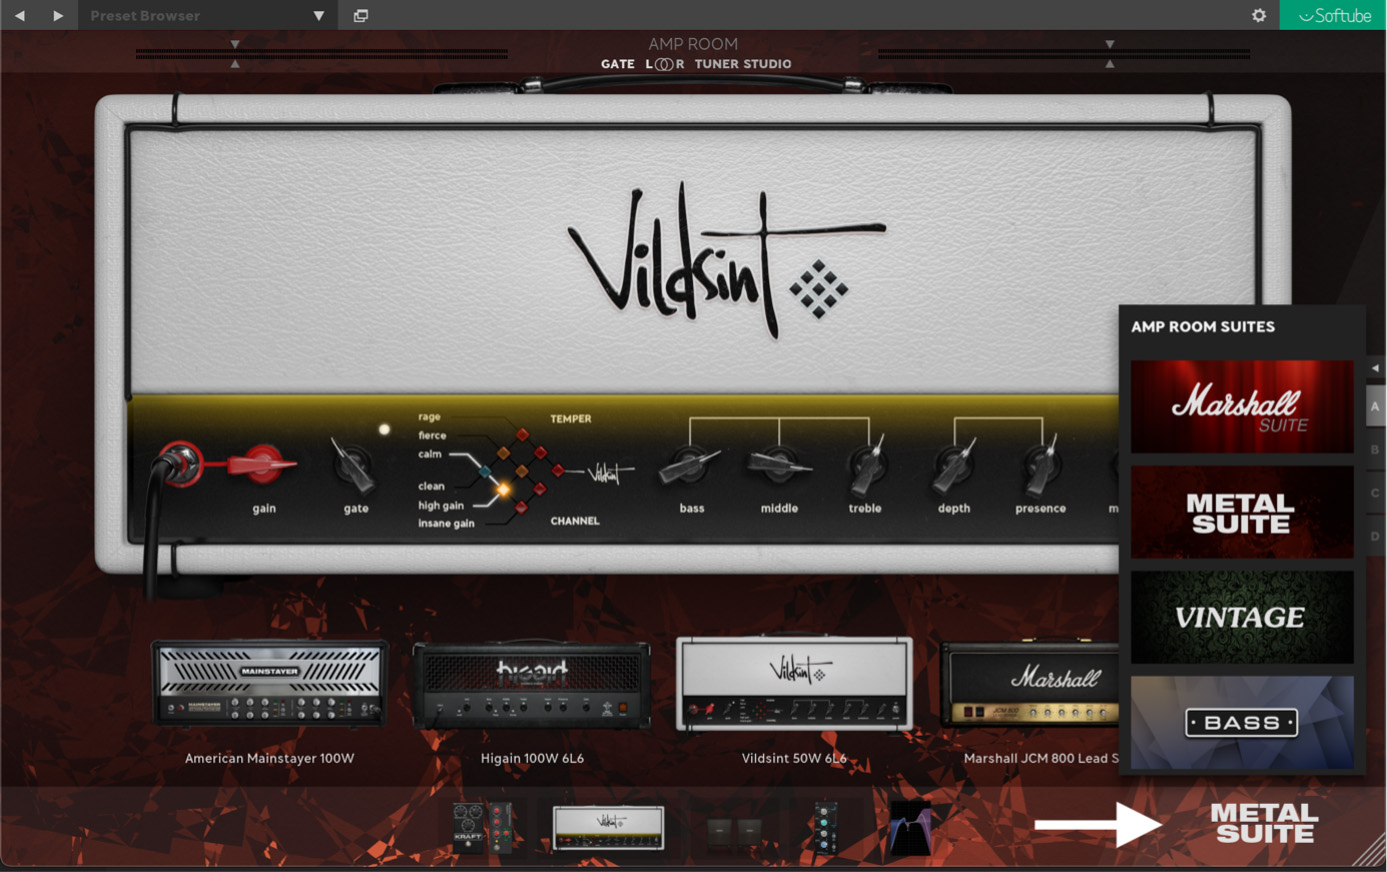
If you own more than one Amp Room Suite, you can switch between Suites by clicking on the Suite selector and selecting another Suite in the list. Choosing a preset from another Suite will automatically switch Amp Room to the Suite where the preset belongs.
The currently loaded Suite (see arrow) is activated on mouse-over. To deactivate this mouse-over pop-up, see “Settings” (cog wheel, top right corner).
Note: all current signal chain progress will be lost when switching to another Suite/preset.
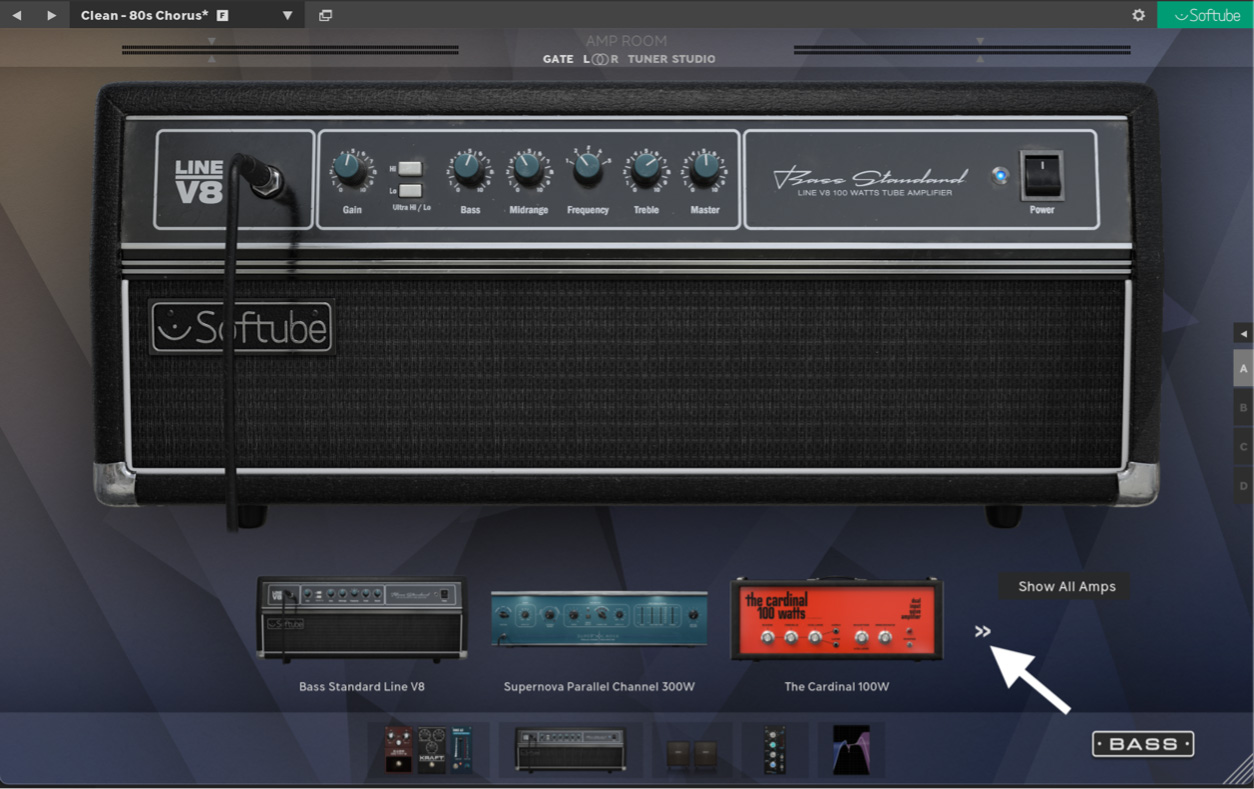
When loading a Suite, only the content that comes with it will show in the amp and cab section. If you own multiple suites, you can always access content from other suites by clicking the "Show all" button in the amp and cab section. Click again to hide non-suite specific content. The pedal and effects sections always show everything.
This concludes the Suite Quick Start manual over Amp Room. We strongly recommend that you also check out the main Amp Room manual for information on Studio mode and all the over features and functions of Amp Room.
Note: Apart from the gear that is included in the Suite, all Amp Room Ready Softube products that you own will also be accessible automatically inside Amp Room. For a complete list of Amp Room Ready plugins, please see the Amp Room Ecosystem page.
The parts of the manual concerning the amplifiers are taken from the official ENGL Savage Mark II manual. Adaptions have been made for the difference between the physical amplifier and the plugin version. Regardless, the plugin version of the amplifier has been modelled to work true to the intentions of ENGL and the properties of the physical amplifiers. This gives that the manual for the physical ENGL Savage Mark II still applies.
A few words from the Amp Designer
The SAVAGE tube amp heads are among the most popular amps in the ENGL product range and the SAVAGE 120 head equipped with a few brand-new unique features has set new standards in the early nineties concerning guitar tube amp technology. For the SAVAGE Mark II series I have undertaken big efforts during the R&D phase in order to usefully enhance some of the proven features to a top-notch level. Furthermore, I equipped these superb amps with a few new features like two mid-range control knobs for main channel I that gives the player additional freedom concerning individual sound creation plus a Noise Gate for Crunch and Lead channels. And last but not least I spent again many hours in intense sound tuning sessions, my favorite labor at ENGL Amps. I hope you will enjoy the results of all my efforts: not even only take my words but rather give my new amp creation a trial - plug in your guitar and play it!
- Horst Langer, ENGL Amplification
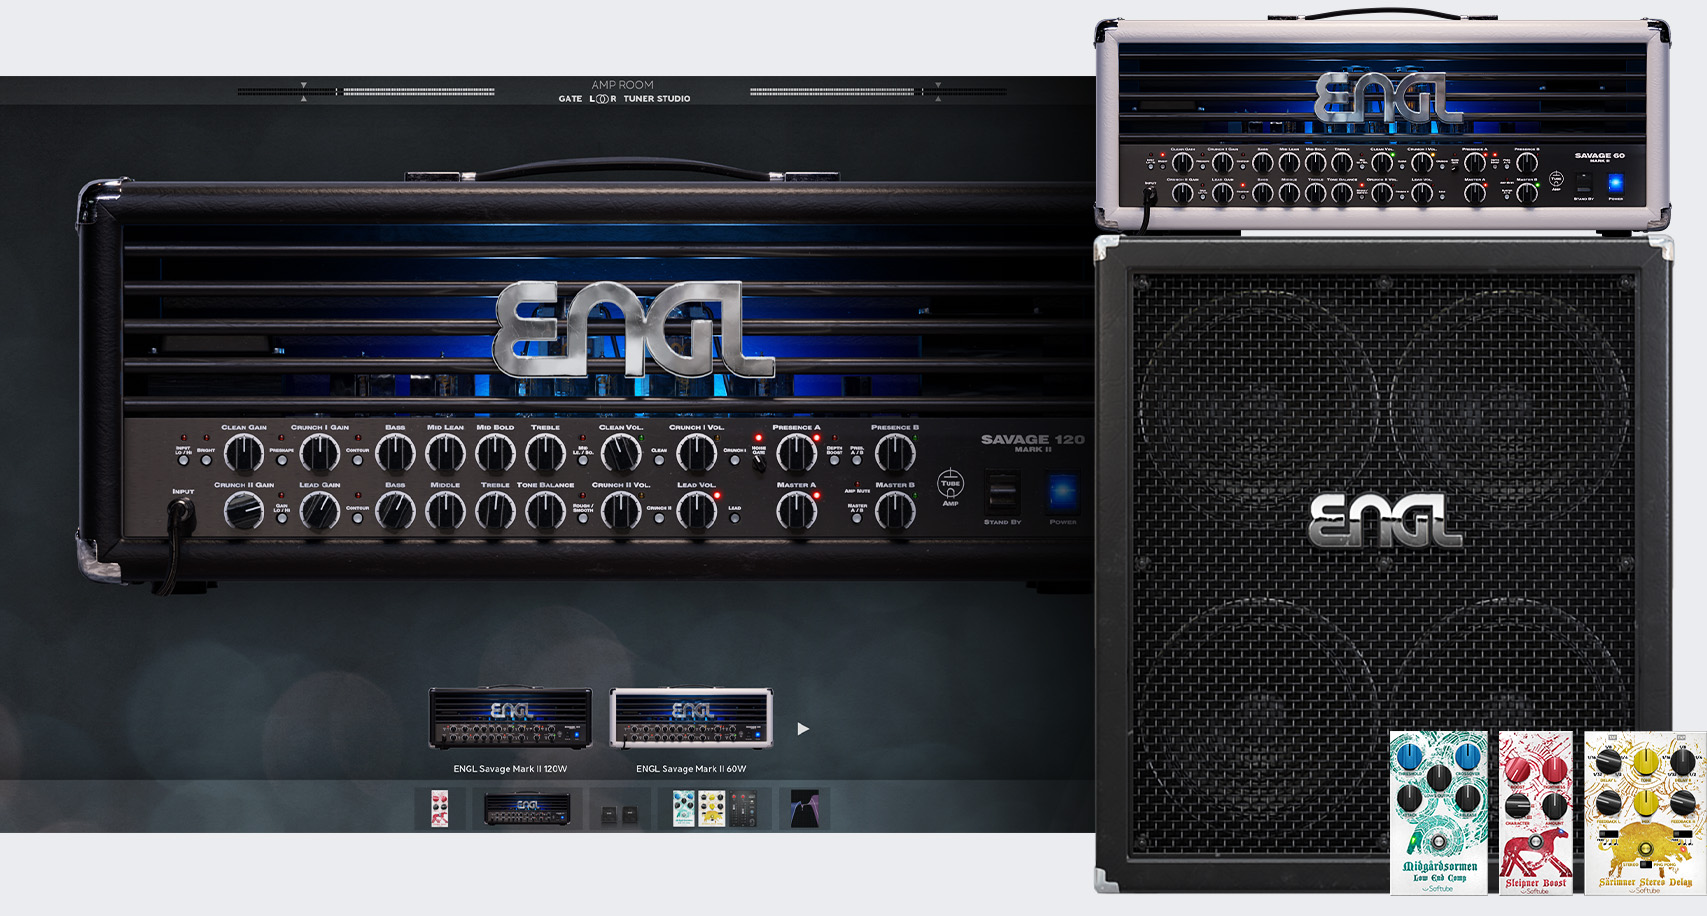
The Engl Savage Mark II is the reincarnation of the legendary Engl Savage 120. With many great improvements and additional functions, you now own one of the most advanced versatile amp heads available today! This sophisticated guitar amp marries the unrivalled tone of all-tube technology to the awesome sound-shaping might of control features powered by state-of-the-art microchip circuitry. This elegant combination puts at your fingertips a vast range of great fundamental tones and an all but inexhaustible reservoir of compelling variations. In addition, the amplifier has a variety of hip and practical features like the Input Lo / Hi switch, the Preshape switch, the Mid Lean / Bold function and many more that are explained in more detail below.
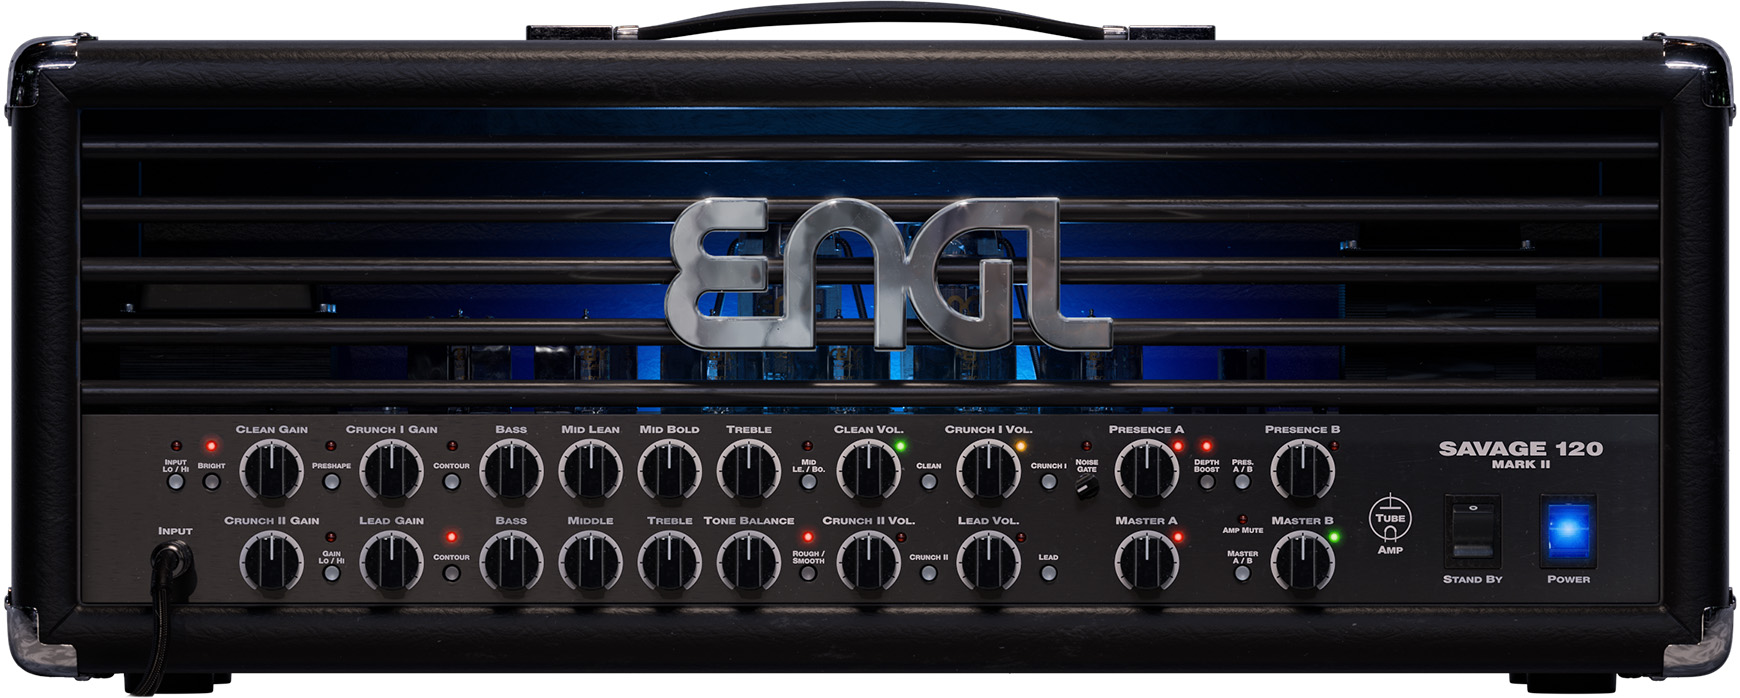
ENGL Savage Mark II 120W – ENGL 6550 power amp tubes
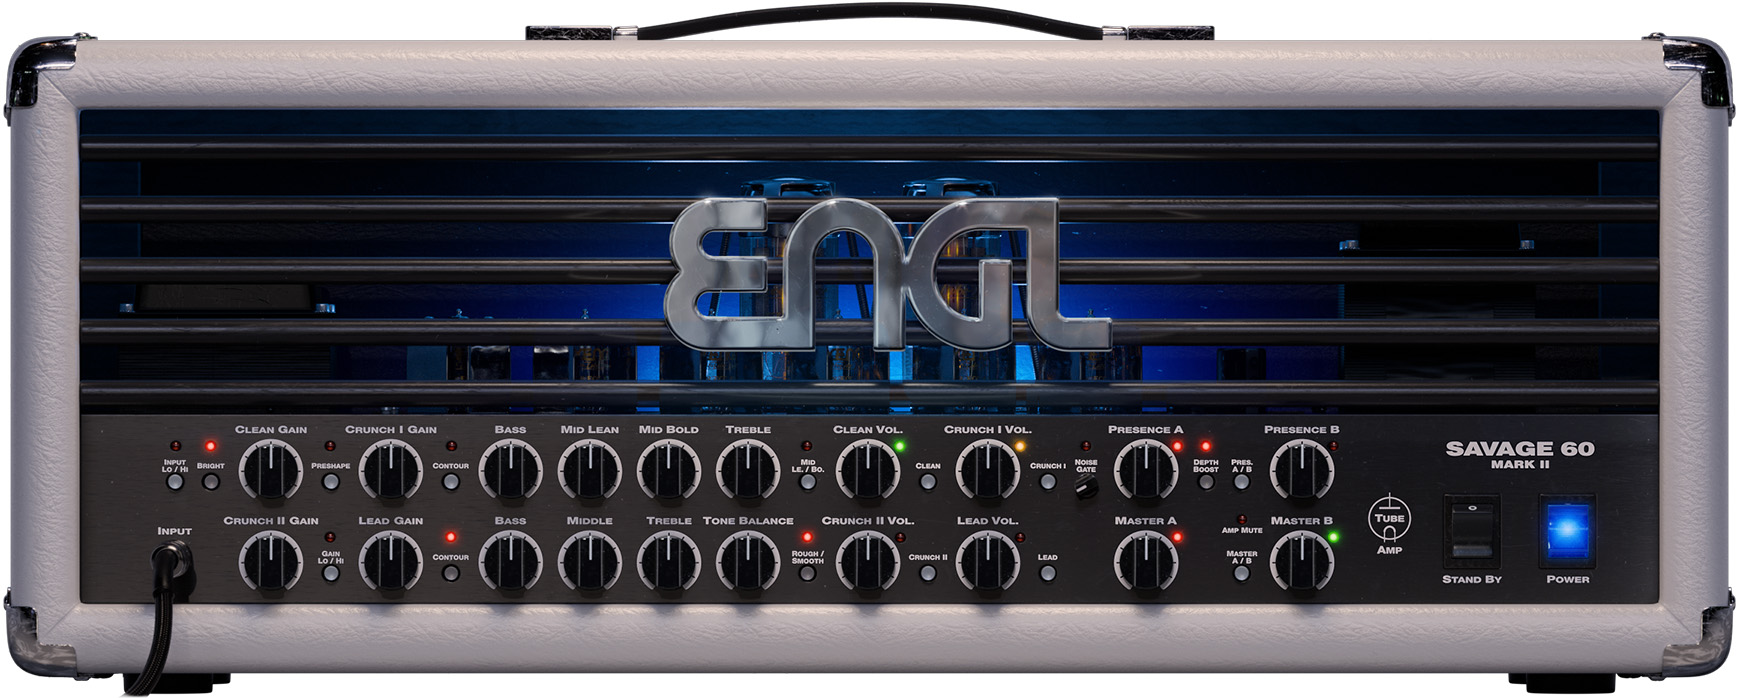
ENGL Savage Mark II 60W – ENGL EL34 power amp tubes
Front Panel
Input Lo/Hi Switch: This feature defines the input sensitivity for all channels. The red LED above the button lights up to indicate when Input Hi is activated. When activated, the level in channels Clean and Crunch I get boosted with approx. 10 dB. The level for channels Crunch II and Lead get boosted with approx. 4 dB.
A tip from the designer: use this feature to reduce the input sensitivity for guitar pickups that delivers a high output level, e.g., humbuckers or active systems.
Bright Switch: Alters the EQ by boosting the upper treble range; effectiveness decreases at higher Gain settings; the BRIGHT feature affects the channels Clean and the Crunch I. The red LED above the button lights up to indicate when BRIGHT is activated.
Clean Gain: GAIN control for the Clean channel. This knob determines the preamp's input sensitivity when Clean channel is selected and, by extension, the preamp signal´s saturation level.
Preshape (Main CH I) Switch: The PRESHAPE filter lowers a certain mid-range spectrum thus the lower end and the upper frequency range gets emphasized stronger when this function is activated.
A tip from the designer: this precisely tuned PRESHAPE filter system is ideally suited to influence the fundamental tonal response in the preamp circuit in order to get different favored sound results. In conjunction with the CONTOUR feature and the two Mid control knobs MID LEAN and MID BOLD you get mighty control over a broad mid-range spectrum which greatly enlarges the tonal flexibility for the two channels Clean and Crunch I.
Crunch I Gain: GAIN control for the Crunch I channel. This knob determines the preamp's input sensitivity when Crunch I channel is selected and, by extension, the preamp signal´s saturation level.
Contour (Main CH I) Switch: The CONTOUR feature alters some parameters and the efficiency of the EQ system in Main channel I and mainly becomes audible in the lower mid-range area between 300 and 700 Hz and to some degree in the upper frequency range between 1.5 and 3 KHz. Activate CONTOUR for a pronounced mid-range spectrum.
A tip from the designer: in a certain acoustical way, the CONTOUR feature inverses the job of PRESHAPE, but it influences different mid frequencies compared to the PRESHAPE filter. From the technical aspect, the CONTOUR function influences the operation mode of the EQ system, mainly the mid control range. If you desire to get a strong mid frequency notch with a massive but defined bottom end and focused treble activate PRESHAPE and leave CONTOUR off and at the same time, use the MID LEAN control to adjust the amount of mid frequency portions in the tonal mix. For a pronounced mid frequency range leave PRESHAPE off, activate CONTOUR and the MID BOLD control knob.
Bass: Bottom end voicing of the preamps passive EQ for the Clean channel and the Crunch I channel.
Mid Lean: This mid control of the passive EQ in Main Channel I - Clean and Crunch I - can be selected via the MID LE/.BO. button, at setting „off“. The mid lean control influences a different accentuated mid frequency range compared to the mid bold control thus the tonal results are unequal at identical control knob settings.
Mid Bold: this mid control of the passive EQ in Main Channel I - Clean and Crunch I - can be selected via the MID LE/.BO. button, setting „on“. The mid bold control influences a different accentuated mid frequency range compared to the mid lean control thus the tonal results are unequal at identical control knob settings.
Treble: Upper range voicing control of the preamps passive EQ for the Clean and Crunch I.
Mid Le./Bo. Switch: With this button you can select one of the two mid-range controls MID LEAN or MID BOLD. The MID BOLD control knob is selected at the activated MID LE./BO. function. The red LED above this button lights up to indicate the that the MID BOLD control knob is currently controlling the mid-range.
A tip from the designer: I decided to assign different frequency ranges and bandwidths to the two MID LEAN and MID BOLD knobs to give you the greatest possible latitude for shaping sounds as you see fit. In practice, this means identical settings on the two knobs yield different tonal results. If you like scooped mids, try dialing in lower settings for Main channel I's MID LEAN knob. Set to lower values, this voicing control cuts big slices of mids from the sonic pie. Conversely, if you activate MID BOLD, you will boost the low mids markedly, which can have a huge effect across the full frequency spectrum of some sounds. These two knobs' different sound-shaping properties together with the PRESHAPE and CONTOUR button's effect on voicing give you many different ways of shaping the midrange.
Clean Vol.: Volume control for the Clean channel.
Clean Switch: Press this button to activate preamp Clean channel. The green LED to the right of the Clean Channel Volume knob lights up to indicate it´s active.
Crunch I Vol.: Volume control for the Crunch I channel.
Crunch I Switch: Press this button to activate preamp Crunch I Channel at the amp. The yellow LED to the right of the Crunch I Channel Volume knob lights up to indicate it´s active.
Noise Gate Switch: Press this LED to activate and suppress excess noise in Crunch I, Crunch II and Lead channels. Control the NOISE GATE using the small level threshold knob underneath the LED. The LED above the button lights up to indicate that the NOISE GATE is activated. Note that the NOISE GATE does not operate when the Clean channel is selected.
Presence A: Power amp PRESENCE A knob. This knob determines the power amp's high frequency response when is activated. The red LED next to the knob lights up to indicate PRESENCE A is active.
Depth Boost Switch: Push the DEPTH BOOST button to beef up the bottom end by about 6 dB. The red LED above the button lights up to indicate the power amp DEPTH BOOST feature is activated.
Pres. A / B Switch: Switches back and forth between Presence A and Presence B. The LED next to the given Presence control lights up to indicate it is on; red signifies PRESENCE A is on; green signifies PRESENCE B is on.
Presence B: Power amp PRESENCE B knob. This knob determines the power amp's high frequency response when is activated. The green LED next to the knob lights up to indicate PRESENCE B is active.
Crunch II Gain: GAIN control for the Crunch II channel. This knob determines the preamp's input sensitivity when Crunch II is selected and, by extension, the preamp signal´s saturation level.
Gain Lo / Hi Switch: Pressing this button ups the gain factor, thereby increasing the amount of distortion in both Main channel II's Crunch II and Lead modes. The LED above this button lights up to indicate Hi Gain is active.
A tip from the designer: When activated, the Hi Gain setting supercharges the amplification factor, switching from Soft Crunch to Heavy Crunch or from Soft Lead to Heavy Lead and putting both channels into high gear. This doubles the number of basic sounds in Main Channel II. The Soft Crunch or Lead setting suffices for high-output pickups - even for playing leads - so you can leave the GAIN LO/HI function off if your guitar is shred-approved. But by all means, for scorching ultra high-gain lead sounds with truckloads of sustain or for power chords with a pronounced but clearly defined bottom-end, go for the Heavy Lead variant with the Gain LO/HI function activated.
Lead Gain: GAIN control for the Lead channel. This knob determines the preamp's input sensitivity when Lead channel is selected and, by extension, the preamp signal´s saturation level.
Contour Switch (Main CH II): The CONTOUR feature alters some parameters and the efficiency of the EQ system in Main channel II and mainly becomes audible in the lower mid-range area between 300 and 700 Hz and to some degree in the upper frequency range between 1.5 and 3 KHz. Activate CONTOUR for a pronounced mid-range spectrum.
A tip from the designer: From the technical aspect the CONTOUR function influences the operation mode of the EQ system, mainly the mid control range. If you desire to get a strong mid frequency notch (a very heavy sound style) with a massive but defined bottom end and focused treble leave CONTOUR off. For a pronounced mid frequency range and an assertive sound response activate CONTOUR.
Bass: Bottom end voicing of the preamps passive EQ for the Crunch II channel and the Lead channel.
Middle: Mid-range voicing control of the preamps passive EQ for the Crunch II channel and the Lead channel.
Treble: Upper range voicing control of the preamps passive EQ for Crunch II channel and the Lead channel.
Tone Balance: This additional EQ control knob is activated in Smooth mode only. Starting from the center position (12 o'clock that is) of the Tone Balance control, a certain lower mid frequency range is emphasized if the knob is turned counterclockwise. If turned clockwise an additional portion of treble is added to the sonic scenario. The effectiveness decreases at higher gain settings.
Rough / Smooth Switch: Switches between two completely unique overdrive characteristics in Main channel II – Crunch II and Lead:
ROUGH: pronounced bottom end and at the same time strong emphasis on the upper frequency range; high efficiency of BASS, MIDDLE and TREBLE controls.
SMOOTH: strong emphasis on the mid frequency range; noticeably lower efficiency of BASS, MIDDLE and TREBLE controls, TONE BALANCE control is activated.
The red LED above this button lights up to indicate that the Smooth mode is activated.
A tip from the designer: The ROUGH sound mode is the right choice for heavier styles with fewer midrange frequencies in the mix but plenty of low- and high-end frequencies. Choose the SMOOTH sound mode to go for vintage tube tone and for playing solos. This sound character is ideally suited to push your guitar tone through in the musical event.
Crunch II Vol.: Volume control for the Crunch II channel.
Crunch II Switch: Press this button to activate preamp Crunch II channel at the amp. The yellow LED to the right of the Crunch II Channel Volume knob lights up to indicate it´s active.
Lead Vol.: Volume control for the Lead channel.
Lead Switch: Press this button to activate preamp Lead channel. The red LED to the right of the Lead channel Volume knob lights up to indicate it´s active.
Master A: MASTER A volume knob controls power amp output. The red LED to the right of the knob lights up to indicate is enabled and determining the master level.
Master A / B Switch: Switches back and forth between the MASTER A and MASTER B knobs. The LEDs next to the knobs light up to indicate which master knob is active: red LED for MASTER A, the green LED for MASTER B.
Amp Mute (LED): This red LED lights up to show that STANDBY is engaged. This means that amplifier is silenced, and no audio will pass through.
Master B: MASTER B volume knob controls power amp output. The green LED to the right of the knob lights up to indicate is enabled and determining the master level.
Standby Switch: When activated, no audio will pass through and the AMP MUTE LED lights up.
Power Switch: Turns the amplifier on/off. Audio will not be processed through the amplifier (audioi is bypassed) when the POWER SWITCH is set to off.
ENGL E412XXL 4x12
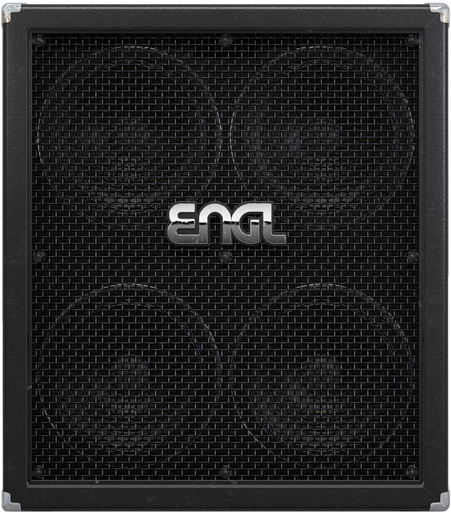
More is more! The ENGL XXL 4x12 cabinet delivers massive low end yet retains the tight mid characteristics for ENGL cabs. No matter how hard you push this cab, it can take it!
Speaker: Celestion Vintage 30
ENGL E412RG Retro Tube 4x12
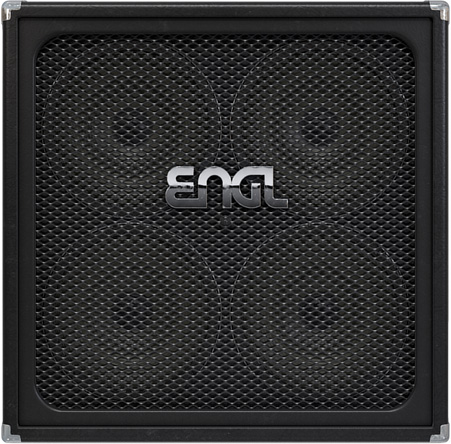
Meticulously designed to produce the hard rock guitar sound of the 60s and 70s. Focused smooth mids with well-rounded lows.
Speaker: Celestion G12H Anniversary
ENGL E412SGB Standard 4x12
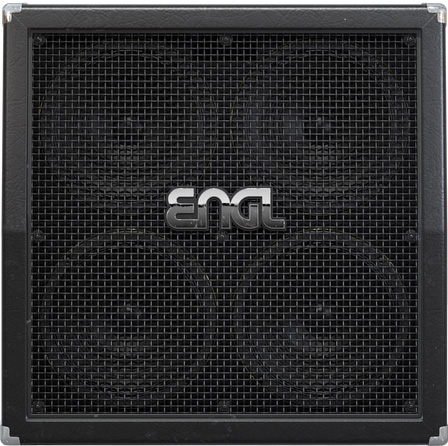
Equipped with V12-60 speakers, offering slightly scooped mids and tempered lows for an overall warm tone.
Speaker: Celestion Vintage 12-60
ENGL E412VGB Pro 4x12
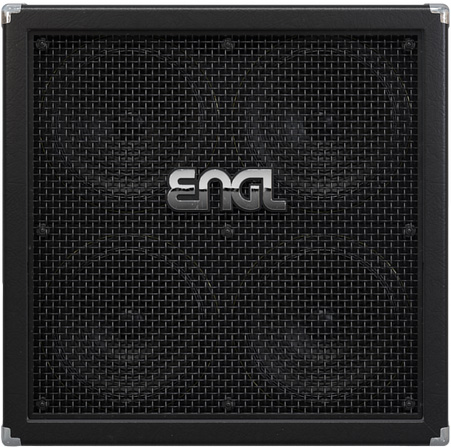
The classic ENGL cabinet from before all V30-loaded cabs were renamed PRO. Featured on more great albums than you can shake a stick at. Has everything associated with a great metal/hard rock guitar sound
Speaker: Celestion Vintage 30
ENGL E212VHB Pro 2x12
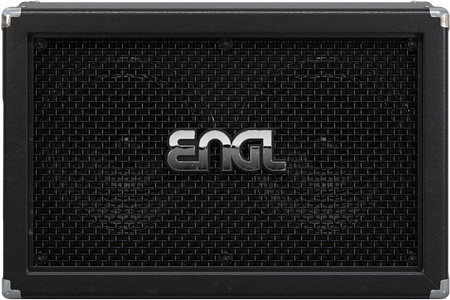
Compact in size but big in sound. It is a mistake to see the 2x12 as inferior to a 4x12. It has its own qualities that are often preferred over a 4x12. This ENGL 2x12 delivers a formidable mid-punch second to none.
Speaker: Celestion Vintage 30
Softube Särimner Stereo Delay
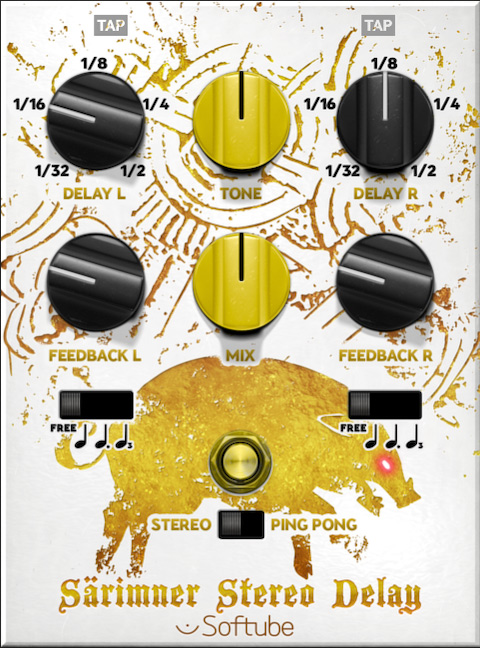
When in Ping Pong mode, the left side sets the delay time and feedback.
Note: The output of this effect is in stereo. To hear the full stereo sound, you may have to switch the track in your DAW to stereo.
Särimner is a boar that is feasted upon every night in Valhalla in Norse mythology.
Softube Midgårdsormen Low End Comp
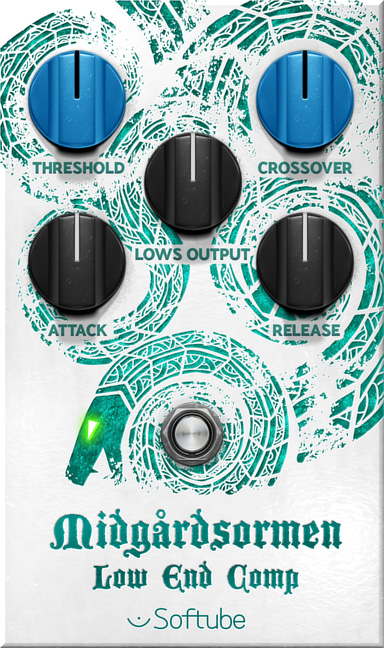
Too much or too little palm mute? Control the amount by compressing the lower frequencies. Crossover determines where compression is applied and Lows Output sets whether extra lows are added or subtracted.
Midgårdsormen, or World/Midgard Serpent, is a sea dwelling creature that encircles the Earth, biting its own tail in Norse mythology.
Softube Sleipner Boost
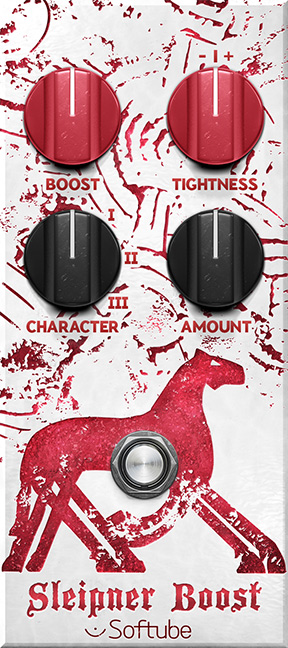
Three different boost characters to be adjusted with the Amount knob. The Boost knob sets the overall boost level from 0 to 40 dB! The Tightness knob controls filters specifically designed to change the character of the amps’ distortion, anything from muddiest mud to tightest tight sounding. Try it along with low gain on the amp to transform it into a different kind of beast.
Sleipner is Odin's eight-legged horse in Norse mythology.
Softube Doom Chvrch reverb
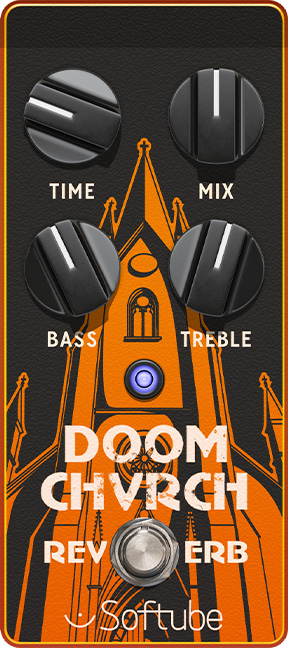
The Doom Chvrch reverb is a marriage between vintage and modern. Some parts, such as the modulation and diffusion, are inspired by the classic EMT 250 reverb, while the reverb tank itself comes from the huge hall we built for the Parallels® instrument. It was designed to allow you to go from a short “boxy” room sound, to epic and almost infinite perturbations that evolve over time into something completely different. It was never intended to sound realistic; it was designed to sound good.
Doom Chvrch is a stereo reverb that will give you a stereo output, even if the input is a mono signal. You can therefore use it in subtle amounts to give some depth to your track. The Time knob provides almost infinite reverberation. Mix adjusts the dry/wet balance and the Bass and Treble controls let you adjust the overall tone of the reverb effect.
“Doom Chvrch” is a local wordplay on the Domkyrka (Cathedral) of Linköping. Founded in the 13th century, it is a prominent part of the Linköping skyline.
American Class A 25 compressor
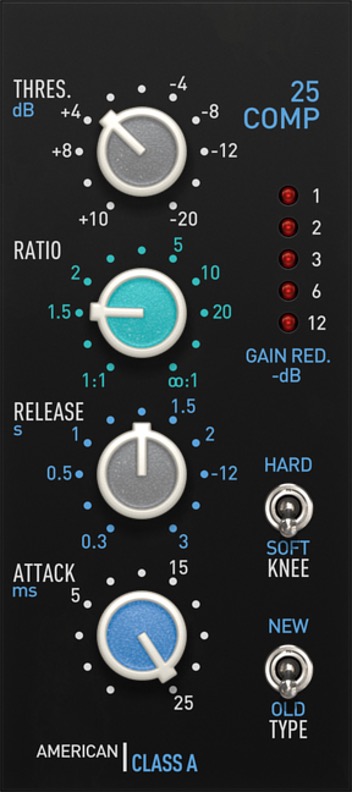
This unit is based on Softube’s take on the greatest classics of American mixing console hardware – a compressor with a famously punchy sound.
Apart from the standard compressor controls, American Class A also features a switch which allows you to choose between a feed forward or a feedback style of compressor. The feed forward (Type = New) is controlled and predictable, while the classic feedback mode (Type = Old) is more punchy.
A Hard Knee has a sharper transition between compressing and non-compressing states. A Soft Knee offers a more gradual transition, where the ratio gradually increases around the threshold. For most applications, Soft Knee is where you want to set it.
The Attack can be set between 1 and 25 milliseconds and the Release from 0.3 to 3 seconds. The Ratio knob sets the ratio which, in general, is often less than what the panel says. Threshold is adjustable from +10 to –20 dBu.
The Gain Reduction meter shows you how much the compressor squishes the sound.
You can either place it as a pedal style compressor in front of an amp, or you can use it as a mixing tool at the end of the signal chain. When using it as a mixing tool, we recommend that you listen to your guitars together with the rest of the mix. You will come a long way with just a touch of compression.
American Class A 55 EQ
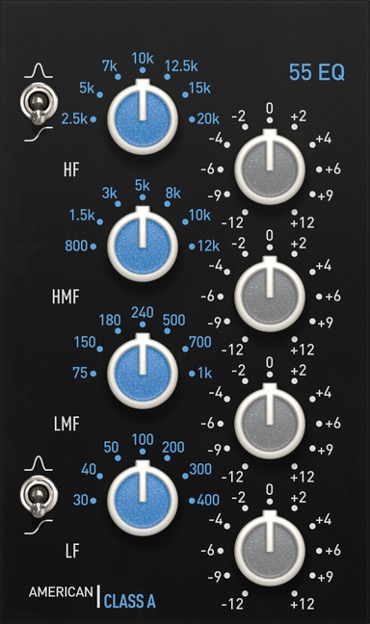
This EQ is based on a classic console equalizer that made it into a four-band 1U mastering equalizer, a Softube Console 1 strip, and now finally turns up inside Amp Room! This EQ is rock music. The weight of the mids are legendary and the punch of the low end can be heard on countless albums.
The four EQ bands each have 7 center frequencies. The Gain knobs are divided into 11 steps, ranging from –12 to +12 dB.
Both the high and the low filter can be switched between Shelving or Bell filters.
You can either use it as a pedal style EQ in front of an amp, or as a mixing tool to sculpt the output of Amp Room. Anything goes!
The Gain Reduction meter shows you how much the compressor squishes the sound.
Room Ambience RoomIR
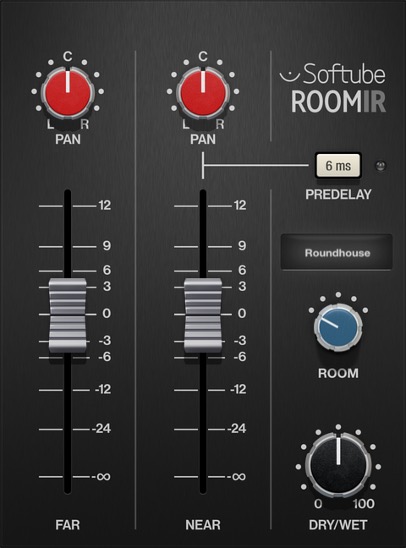
If you connect an instrument to your sound card and run the signal through Amp Room while using headphones, you will hear a completely dry signal.
With this effect somewhere near the end of your signal chain, you can add some natural room ambience.
Five room impulse responses are available. All of them have Near and Far faders, plus you can choose to delay the Near response with a pre-set predelay time to achieve a great slap-back effect. The two Pan knobs lets you spread out the room impulses in the stereo field.
Room info:
- Roundhouse: A wooden curved house in Oslo, Norway.
- Brick Brewery: Is what the name says. Located in Copenhagen, Denmark.
- Concrete Harbor: A stripped bare office floor, overlooking the harbor in Torshavn, Faroe Islands.
- Fallout Shelter: A classic Scandinavian public fallout shelter. Recorded in Helsinki, Finland.
- Winter Garden: Beautiful place. Owned by a well-known Swedish actor. Located outside of Stockholm, Sweden.
Note: The output of this effect is in stereo. To hear the full stereo sound, you may have to switch the track in your DAW to stereo.
Patrik Jensen – Product Owner
Stefan Aronsson – Product Marketing
Kim Larsson, Mattias Flygare, and Thomas Andersson – DSP modeling
Pelle Serander – Framework programming
Björn Rödseth – DSP backend programming
Patrik Jensen and Niklas Odelholm – General graphic design
Ulf Ekelöf – Graphic design
Stefan Aronsson, Patrik Jensen and Ronnie Björnström – Presets
Emanuel Enbäre – Quality assurance