User Manual
FET Compressor
Intro
User Interface
Tweaking Tips
Block Diagram
Extended Features
Credits
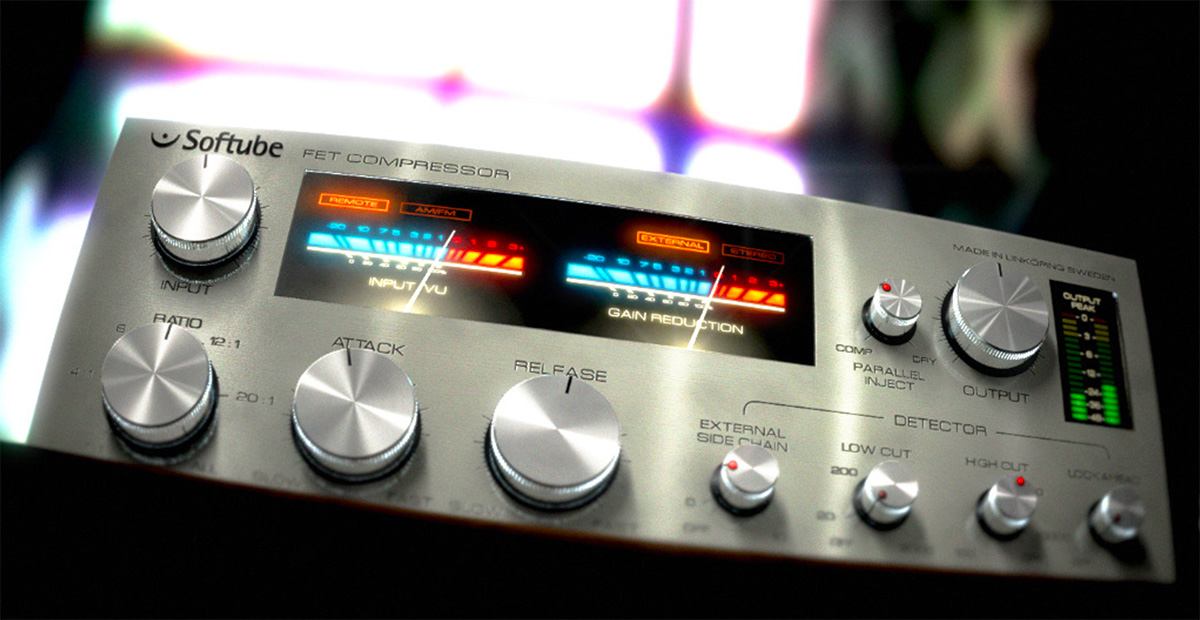
The FET Compressor is based on the most famous hardware FET compressor, and very much effort has been spent modeling the real hardware to make sure that this one sounds exactly the same. If you only use the big knobs and the six fixed ratios you’ll get exactly the same analog sound and functionality as the real deal. But that’s just the beginning. With the help of digital technology we have added some useful features that still have that analogue sound – but features that would’ve been hard or even impossible to implement with analog electronics. That way you will be able to get the best of two worlds. (Not even mentioning how ridiculously many FET Compressors you will be able to fit into your project without running low on CPU.)
Not convinced yet? Set the Input on MAX, Ratio on ALL. Listen.
Design Philosophy
There are three main ideas behind this design: first of all, we wanted to make an analog sounding digital compressor. Nothing must stand in the way of the sound. Every single part of the simulation contributes to making this piece unique. The extremely fast attack, all the subtle (and sometimes not so subtle) distortion that comes from the different parts of the compressor and the extremely careful way the signal is handled and conditioned through out the signal chain.
Second, we added features to make this product even more versatile and unique. The enhanced ratio, parallel compression, detector filtering and lookahead are such features. Third, these features must not stand in the way of the usability. The fewer knobs the better, and the faster the user gets the sound they want, the better.
This boils down to a single main objective: Every user should be able to get a good sound within seconds, and no user should be afraid to mess up the sound. An amateur should be able to make this sound just as good as a pro. And yeah, it has to look good.
In order to achieve these objectives we had to put special effort into the modeling. The original hardware has some quite quirky circuits, and a lot of its sound comes from far from ideal components and design. A lot of new ideas were developed during the modeling, and with the help of our expert listener and “golden ears” Dan Lumbye, we managed to put together a piece of software that should please even the most critical ears.
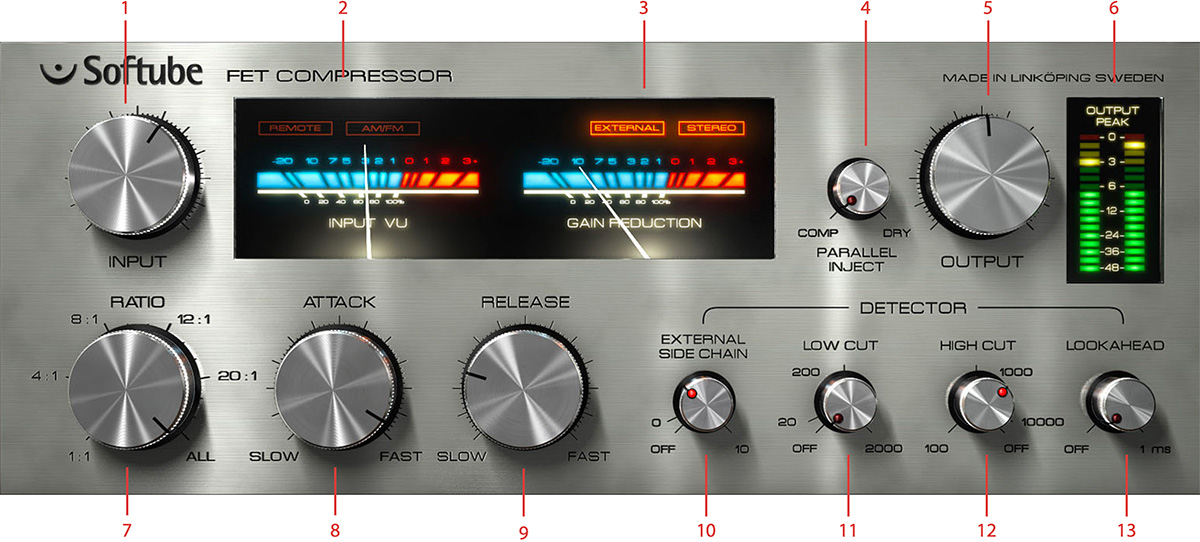
- Input volume
- Input VU
- Gain reduction VU
- Parallel inject
- Output volume
- Output peak meter
- Ratio
- Attack time
- Release time
- External sidechain volume
- Low cut
- High cut
- Lookahead
The controls of the FET Compressor are divided into two sections.
First of all we have the big knobs (Input, Ratio, Attack, Release and Output), which are the knobs that you will use every time you use the compressor. These knobs are pretty standard and you probably already know what they do.
Then we have the smaller knobs (External Sidechain, Low Cut, High Cut, Lookahead, and Parallel Inject), which don’t have to be tweaked every time you use the compressor. You don’t even have to feel bad if you never touch them. People have managed to make hit records for 40 years without them. Nevertheless, they are extremely useful, and soon you’ll have a hard time understanding how you ever could’ve managed without them.
In addition to this, we also added some metering so that you can monitor your signal all the time. An input VU meter (which is fun to drive into the reds all the time) and a stereo output peak meter make sure that you always know what is going on with your signal.
Input
The Input knob on this compressor works both as a gain control and a threshold control. If you increase the Input volume you will also increase the gain reduction, which makes it work sort of like a combination of a gain knob and a reversed threshold knob. You can drive the INPUT VU far into the reds without any unwanted digital clipping. Just make sure that the OUTPUT PEAK meter doesn’t indicate any clipping. (If it does, just lower the Output volume a bit.)
The input knob also works as a threshold control. More input gain will give you more gain reduction.
If you drive the input volume so that the VU start hitting the reds you will also add more distortion to the signal. If you want lots of distortion we recommend you to also set the Ratio knob on ALL.
More input gain also means more distortion (in a good way).
Ratio
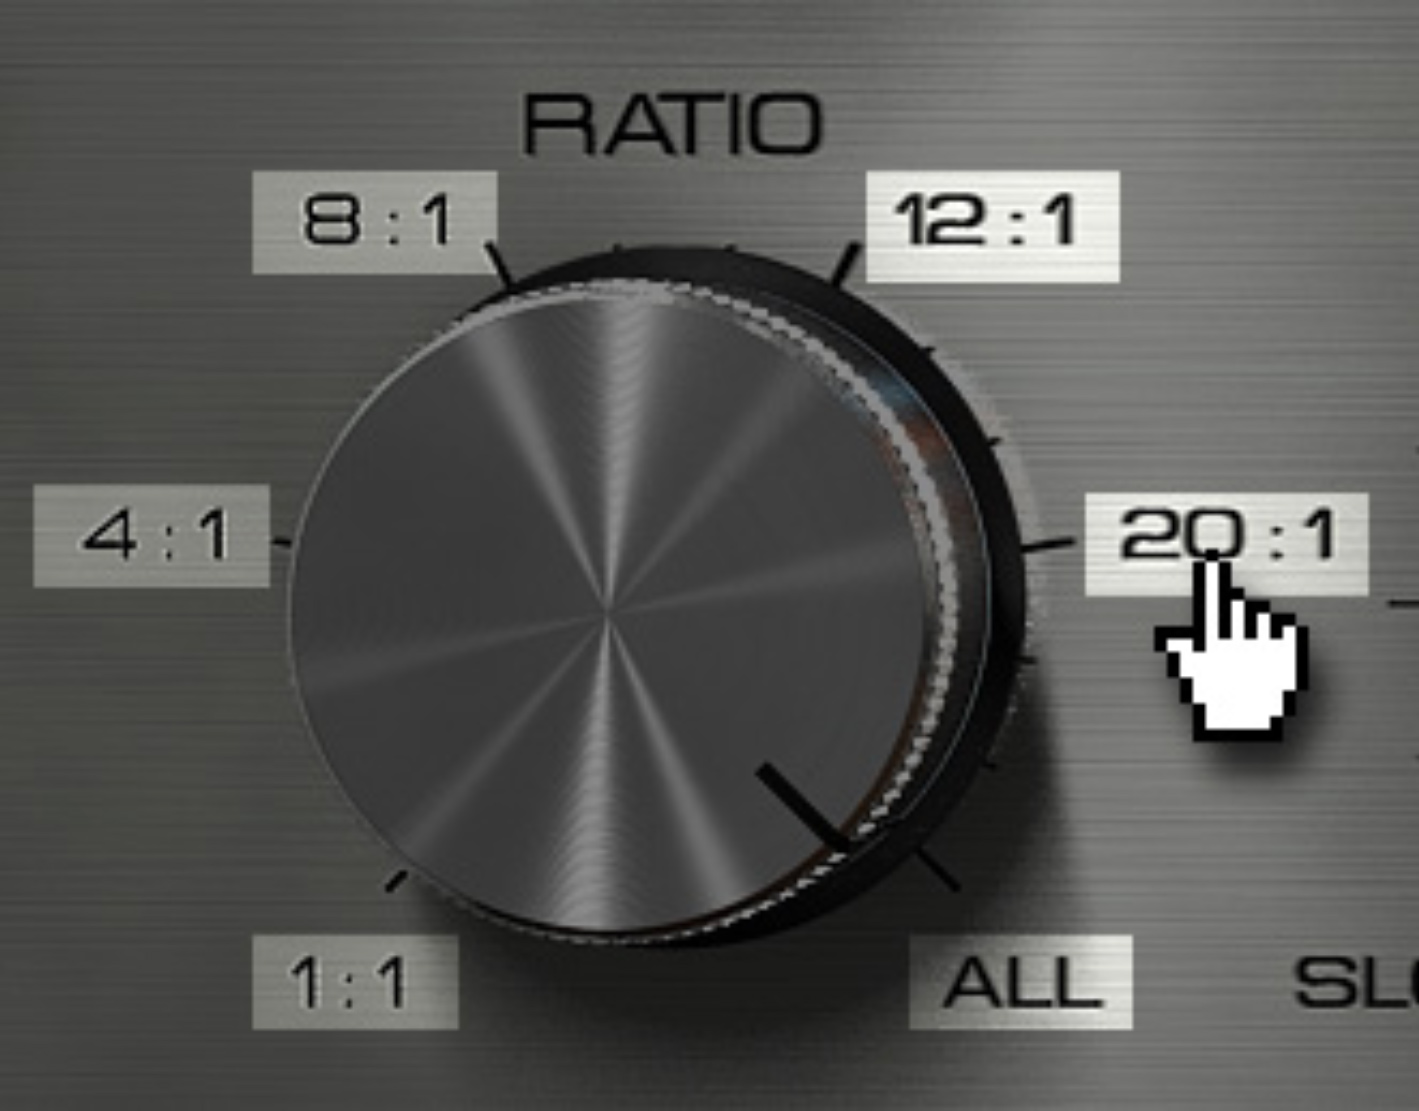
At a first glance, the Ratio knob on the FET Compressor seems to work a little bit different than its hardware counterpart. The biggest difference is that the Ratio knob is continuous, meaning that it’s possible to select settings between different fixed ratios, for instance between 12:1 and 20:1. Furthermore, it’s also possible to select settings between 20:1 and the famous “All buttons in”setting.
If you would rather use the “predefined” settings that are identical to those on the original hardware: 1:1, 4:1, 8:1, 12:1, 20:1 and ALL, just click on the labels to jump directly to those settings.
“All Buttons In” Mode
The ALL mode is a peculiarity found on this type of compressor. Originally the different ratios were selected with push buttons, which made some mix engineers try out what happens if you press all buttons at once. From a technical perspective, pushing all buttons at the same time makes all bias levels go berserk. From a sound perspective, this means that you will get a very pumping compression with lots of distortion. This mode is often called the “British mode”. By setting the Ratio somewhere between 20:1 and ALL you’ll get a sound that’s definitely unique for this product.
Attack and Release
Use the Attack and Release controls to change how fast the compressor starts to compress (Attack) and how fast it should recover from the gain reduction (Release). The attack time on this unit is very fast, ranging from about 20 μs at the fastest setting to about 800 μs (that’s micro-seconds!) on its slowest setting. Other kinds of compressors often have much slower attack times. In comparison to the attack time the release times are much slower – ranging between 50 ms and 1.1 s. Please note that these numbers only give a general idea of the attack and release times. In practice (and just like in the modeled hardware), the attack and release times will be program dependent, ie. depend on the characteristics of the input signal.
Since a fast attack and release time leads to a fast gain reduction, sometimes those settings will cause unwanted “clipping effects”. To remove this unwanted side effect, you can either slow down the release time or add some look ahead to the detector circuit (See “Lookahead”).
Input and Gain Reduction VU meters
The Input VU meter is used to monitor the input signal. If a stereo signal is present, the meter will display the maximum energy of both signals. This may seem like a drawback, but since the gain reduction circuit (a.k.a. “detector” or ”side chain”) works in mono, the VU will actually display the same thing the detector sees. (Unless you start fiddling with the small knobs, but we’re not there yet.)
The Gain Reduction meter is used to monitor the amount of gain reduction in the compressor. The FET Compressor has only one detector, so if a stereo signal is present the gain reduction will be the same for both channels. This prevents unwanted distortion of the stereo image.
If the Ratio knob is set at ALL, the Gain Reduction meter won’t show the same results as the original hardware. Instead it will display the actual gain reduction (which the original unit doesn’t). You will also notice that the Gain Reduction sometimes display positive values when the Ratio is set at ALL, which is correct. The ALL mode does indeed have negative gain reduction (=positive gain) for some settings.
Output
In comparison to the Input knob, the Output knob doesn’t do much more than just adjusting the output volume. Keep a close look on the OUTPUT PEAK meter while adjusting the output volume to avoid unwanted digital clipping. It is good practice to keep the levels below 0 dB, even if you are using a (native) host that allows level above 0 dB.
Output Peak Meter
The output peak meter is a fast peak meter with hold values. Single peak values up in the reds (at 0 dB) are okay, but don’t push it. This meter will display the left and right channel on the left and right meter if you use the plugin in STEREO mode, otherwise it’ll just show the same MONO signal on both meters.
Detector Controls
The most important part of any compressor is the detector. It is the detector that decides how the compressor should compress. All controls except the Output (and Parallel Inject) control the detector, but in this plug-in we have chosen to bundle the four advanced knobs together and call them “detector controls”.
Common to all these controls is that they can be turned off by setting them in the OFF position. Their status LED will light up when ever they are active.
Don’t be afraid to keep these controls in the OFF position. Use these controls if there is something particular that you’d like to achieve or something that needs to be fixed (If it ain’t broken, don’t fix it!).
External Side Chain
In some plugin formats, such as RTAS, VST3 and AU, it is possible to use an external signal as input to the detector. This is very common if you for instance want to compress a bass line using the bass drum as the trigger to the compressor. In that case, the bass line will be compressed when ever the bass drum is hit.
Even if an external side chain signal is present, you will have to activate the external side chain by increasing the External Side Chain knob until the LED lights up. If the External Side Chain knob is in its OFF position, the detector will always use the regular input.
Use the External Side Chain knob to set the input volume of the external signal (for instance the bass drum track). A higher input volume will lead to more gain reduction, just like the Input knob works without an external side chain.
Monitor the Gain Reduction VU Meter when you set the level of the external side chain. Just increase the External Side Chain until you get enough gain reduction.
Low Cut and High Cut
The Low and High Cut can be used to filter the signal before it reaches the detector. A good practice can be to remove some of the (unwanted) low frequencies so that they don’t affect the gain reduction. Another trick is to apply filtering so that only certain frequencies cause the detector to compress the signal. If you for example compress a drum kit, you might want to keep the boominess of the bass drum, but compress the cymbals and snare. Set the Low Cut to 200-300 Hz so that the bass drum will get filtered out before it reaches the detector.
Please keep in mind that Low Cut and High Cut don’t alter the direct signal, just the signal that enters the detector.
Please note that the 200 and 1000 Hz settings on the Low and High Cut knobs corresponds to the knob being set at 12 o’clock (where the little indicator lines are located). The easiest way to get to that setting is to click on the 200 or 1000 label on the panel.
Lookahead
The Lookahead can be used if the fastest attack time isn’t fast enough, for instance if you want to apply some heavy limiting to a signal. The Lookahead will delay the signal path outside of the detector by up to 1 ms, leaving the detector signal unaffected. This has two effects:
- The output signal will be delayed by up to 1 millisecond.
- The detector will “see” the undelayed signal, but reduce the gain on the delayed signal. This means that the detector will be able to compress the signal before the actual transient comes (since the actual transient has been delayed).
The Lookahead time corresponds to the total latency of the plugin. The plug in will not report this latency to the host, since almost no hosts support compensating for a delay that depends on a parameter.
Some very fast Attack/Release settings will cause a “crackling” sound on transients, often sounding like some sort of digital clipping or saturation somewhere in the signal chain. This is very typical for this kind of compressor, but is usually an unwanted effect. The normal way to get rid of this “side effect” is to slow down the attack and release times but now you have another tool to use. By adding a little lookahead to the detector, many of these side effects can be avoided.
Parallel Inject
Parallel Compression is a technique where you blend the compressed signal with the original signal. Say that you have a heavily compressed drum track where all the transients have been lost (compressed). By adding a little bit of parallel compression you can blend in the original signal (with the original transients) with the highenergy compressed signal (without transients) and thus get the best of both worlds.
This is a technique that is very easy to achieve with a send bus, but this baby does a little bit more than that. First of all, you won’t get any problem with the Lookahead since the dry signal is delayed with the same delay time as the compressed signal. Then the dry signal will be affected by the same analogue modeling mojo as the compressed one, which means that some of the distortion and coloring of the compressor will also have a an effect on the dry signal. And at last, the Output Peak meter will of course show the sum of these signals, so that you can set a proper output level.
Whenever you change the gain reduction (for example by changing the input volume) you will need to change the Parallel inject since the volume of the compressed signal has changed. But be careful sometimes the dry signal is much louder than the compressed signal!
Status Indicators
The FET Compressor comes with a couple of handy status labels, located in the VU meter section.
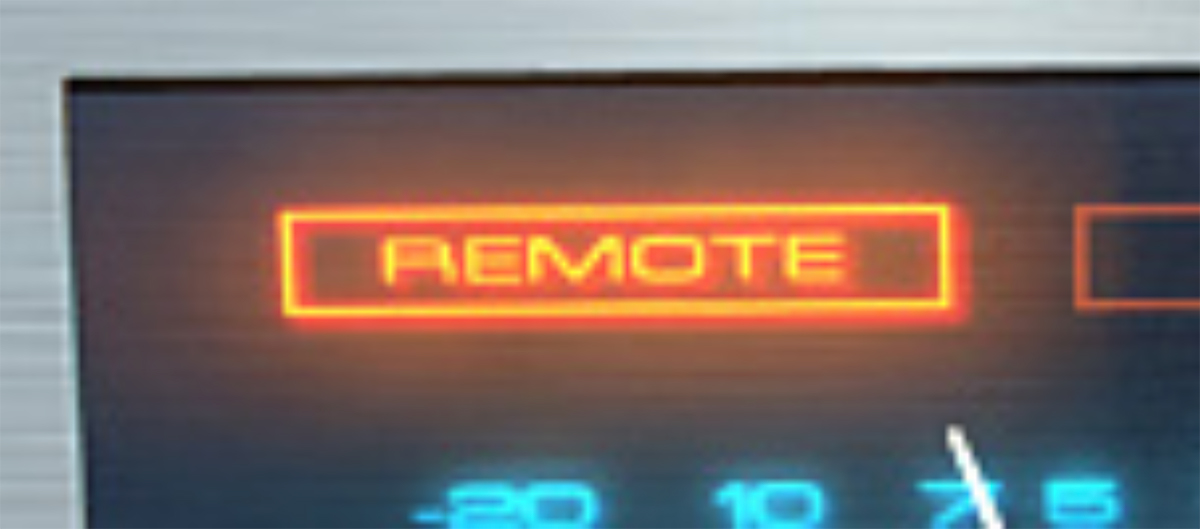
Remote (Pro Tools only)
Whenever automation is used, or if an external control surface is connected, the Remote status indicator will light up. The knobs that are being controlled will also get a thin frame around them.
External
This indicator displays when an external side chain is present. Whenever an external side chain is present, it is possible to use the External Side Chain knob to set the amount of gain of the external signal to the detector.
In Pro Tools it will light up whenever you have connected a side chain bus to the plugin. This indicator will always be lit in hosts that use the Audio Unit (AU) format. In VST, it will light up if the host accepts side chain inputs, but this doesn’t work for all VST hosts... So it goes.
Stereo
The Stereo indicator lights up if the compressor was instantiated in stereo mode.

We didn’t want to include too much of the standard “this is how a compressor work” theory, but rather focus on the parts that make this plugin special. Here are our favorite tweaks.
I want distortion!
There are two types of distortion in a compressor like this, first we have the input and output stage distortion and second the (frequency dependent) distortion caused by the compressing. To get the first type of distortion, just increase the Input until you get enough distortion. You can even have Ratio set to 1:1 (=no compression). The other type of distortion is usually caused by a fast attack and release time. If you set Ratio on ALL and Release on FAST, you’ll get the fastest release time possible. Try the Distortion presets.
The compressor isn’t fast enough
If you find that the Attack time isn’t fast enough (doesn’t squash all the transients), increase the Lookahead until you’re satisfied.
The compressor is too fast
The Attack times get slower if Ratio is set on ALL, so in order to get a late attack set Ratio on ALL. If you want to increase the transients but compress the rest of the signal, use the “all buttons in” mode. Try the Transient presets.
It makes crackling sounds on the transients
This is because of the extremely fast attack time. First you can slow down the Attack times so that the gain reduction becomes not as abrupt as it was. To compensate for the slower attack time, increase the Lookahead.
All the energy and attack of each note disappears
It is a fast compressor and chances are that it will compress fast transients (yeah?). That’s why we added the Parallel Inject. By increasing the Parallel Inject you can blend in a little bit of the original signal (with the original transients). Try to balance it so that you get the transients from the dry path and the rest of the signal from the compressed path.
All the energy and attack of each note disappears (pt II)
Another trick you could try, if you’d like to restore some of the transients is to narrow down the detectors frequency bands by adding some Low Cut and High Cut filtering. It doesn’t work on all program material, but it’s worth a try.
I want some cool drum bus tricks
Ok, here are our favorites:
- Fat Bass Drum: Apply heavy compression on your drum bus. Increase the Low Cut knob until the bass drum doesn’t trigger the compressor (at about 200-300 Hz). In most cases, this will make the bass drum sound fatter and louder compared to the rest of the kit.
- Pumping Drums: Set Ratio on ALL, Release on SLOW and adjust the Input until you’re satisfied. Blend in some dry signal with Parallel Inject.
- Sustained Drums with Transients: Apply heavy 20:1 compression with fast release and attack times, blend in some transients with Parallel Inject.
Adding color
Finally you shouldn’t be afraid of using this plugin in the 1:1 mode. You won’t get any compression, but it will color the sound. And the meters look nice too.
Below is a block diagram over the FET Compressor functionality. Please note that this illustration depicts the functionality of the plugin – the inner workings are quite different. The experienced reader will for example notice that some parts, like the feedback connection of the compressor, have been omitted in the illustration for the sake of clarity.
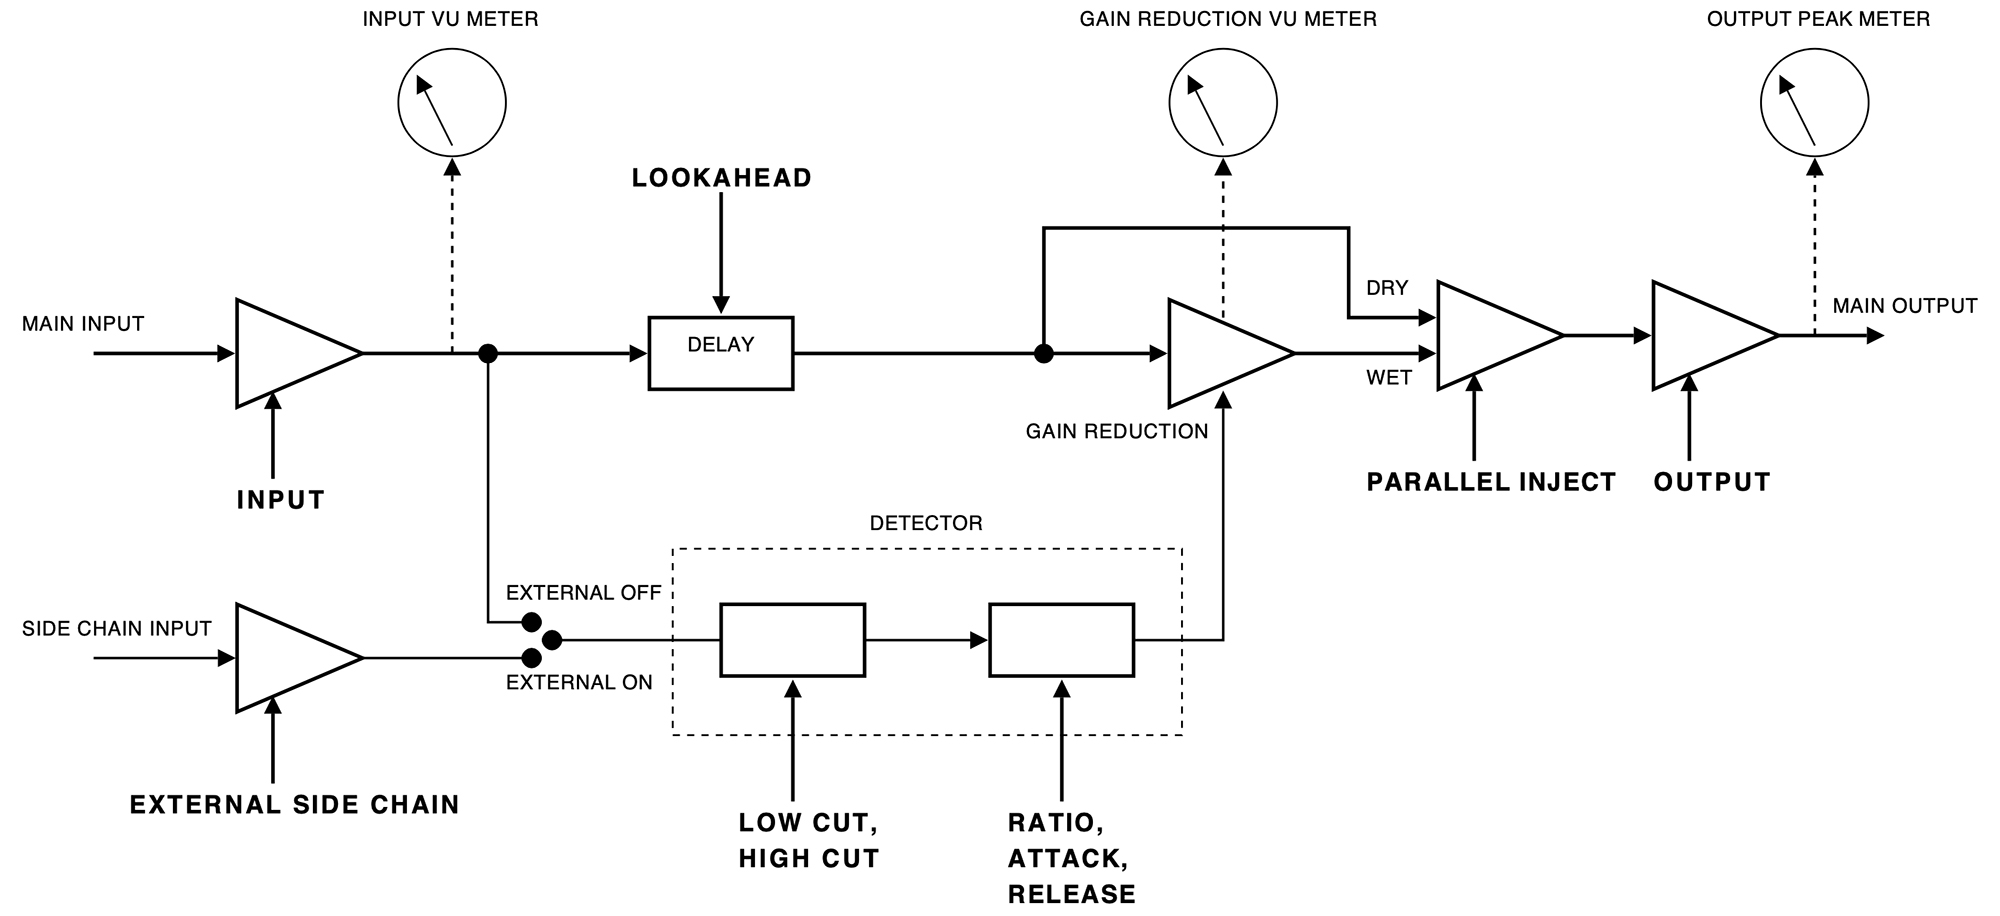
Click here to view the full-sized image in a new tab
A whole range of added control can be accessed with Extended Features. Please see the separate "Extended Features" manual for more information.
Oscar Öberg – Modeling and implementation
Torsten Gatu – Framework programming
Niklas Odelholm – Framework programming and graphic design
Arvid Rosén – Framework programming
Ulf Ekelöf – 3D rendering and graphics
Dan Lumbye – A/B testing
Stefan Fandén – Feature hunter
Thanks to Lars Nygaard and Anders Bech at Cyberfarm (DK) and Per Åkesson at Care Of Sound Studio for letting us use and abuse their equipment.