User Manual
Tonelux Tilt and Tilt Live
Foreword by Paul Wolff
Intro
User Interface
Tilt Live
Buying Recommendations
Tonelux Tilt and Tilt Live for Amp Room
Extended Features
Credits
After the success of the TILT control on the MP1 and MP1a Mic Preamps, I felt that a rack mount unit would be a nice addition to the Tonelux product line. The decision was made to make it an 8 channel unit, with polarity, in/out and access with D-subs for ease of use.
After using the TILT rack unit on a few sessions, I was shocked at how useful it was, and how smooth and sweet it made tracks. I tried it on everything from Bass to Overheads, Guitars, Vocals etc. It did so much with only one knob that the only logical move was to make a plug in. While designing the features, Softube and Tonelux thought that having a few extra options would really fill out the module.
We decided to model the transformer in the Tonelux products, and added a very smooth high and low pass filter, not to fix problems, but to have the ability to use a filter that sounded like it wasn’t there. On top of that, we added a loudness feature to the TILT knob, allowing the engineer to boost both low and high at the same time, much like a loudness control used in post production, to simulate near and far positioning. So far, the few friends that we have sampled it to have loved it, with comments like “it’s just smooth” or “beautiful on over heads, just enough sheen”.
After showing the TILT rack unit at a trade show, it was suggested that we consider a live version, which might include some different features, one of which was a way of limiting the boost, but retaining the TILT effect, to prevent feedback in wedges and side fills, so Softube came up with a unique “Boost Cieling” control, where you can set the amount of maximum boost above normal, to prevent feedback, but when using in-ear monitoring you can still have the original effect. It works really well to compensate ear fatigue without altering a complex EQ or certain individual channel EQs. It never really gets “louder”, it just gets “clearer”.
Paul Wolff
Designer and Founder of Tonelux
The Tonelux Tilt plug-in is a joint development effort between Tonelux designer Paul Wolff and Softube, bringing the famous Tonelux sound to the digital world. The innovative Tilt design was first featured on the Tonelux MP1a discrete mic preamp module and has been a godsend for engineers and producers that need to take control of their sound in a fast and effective manner. Often, the Tilt knob is all you need to make a track sit better in a mix or to make a track “warmer” or “cooler” and it’s perfect in a live situation where you need to tweak the whole mix to adjust for ear fatigue.
The Tilt plug-in features not only the original Tilt design but also adds a couple of new features. A special “Live” version of the Tilt plug-in is included which is optimized for the DIGIDESIGN VENUE system and contains features requested by live sound engineers. The Tilt also includes modeling of the transformer found in the MP1a mic preamp, which adds a subtle distortion for bass frequencies that fattens up the low end of a track.
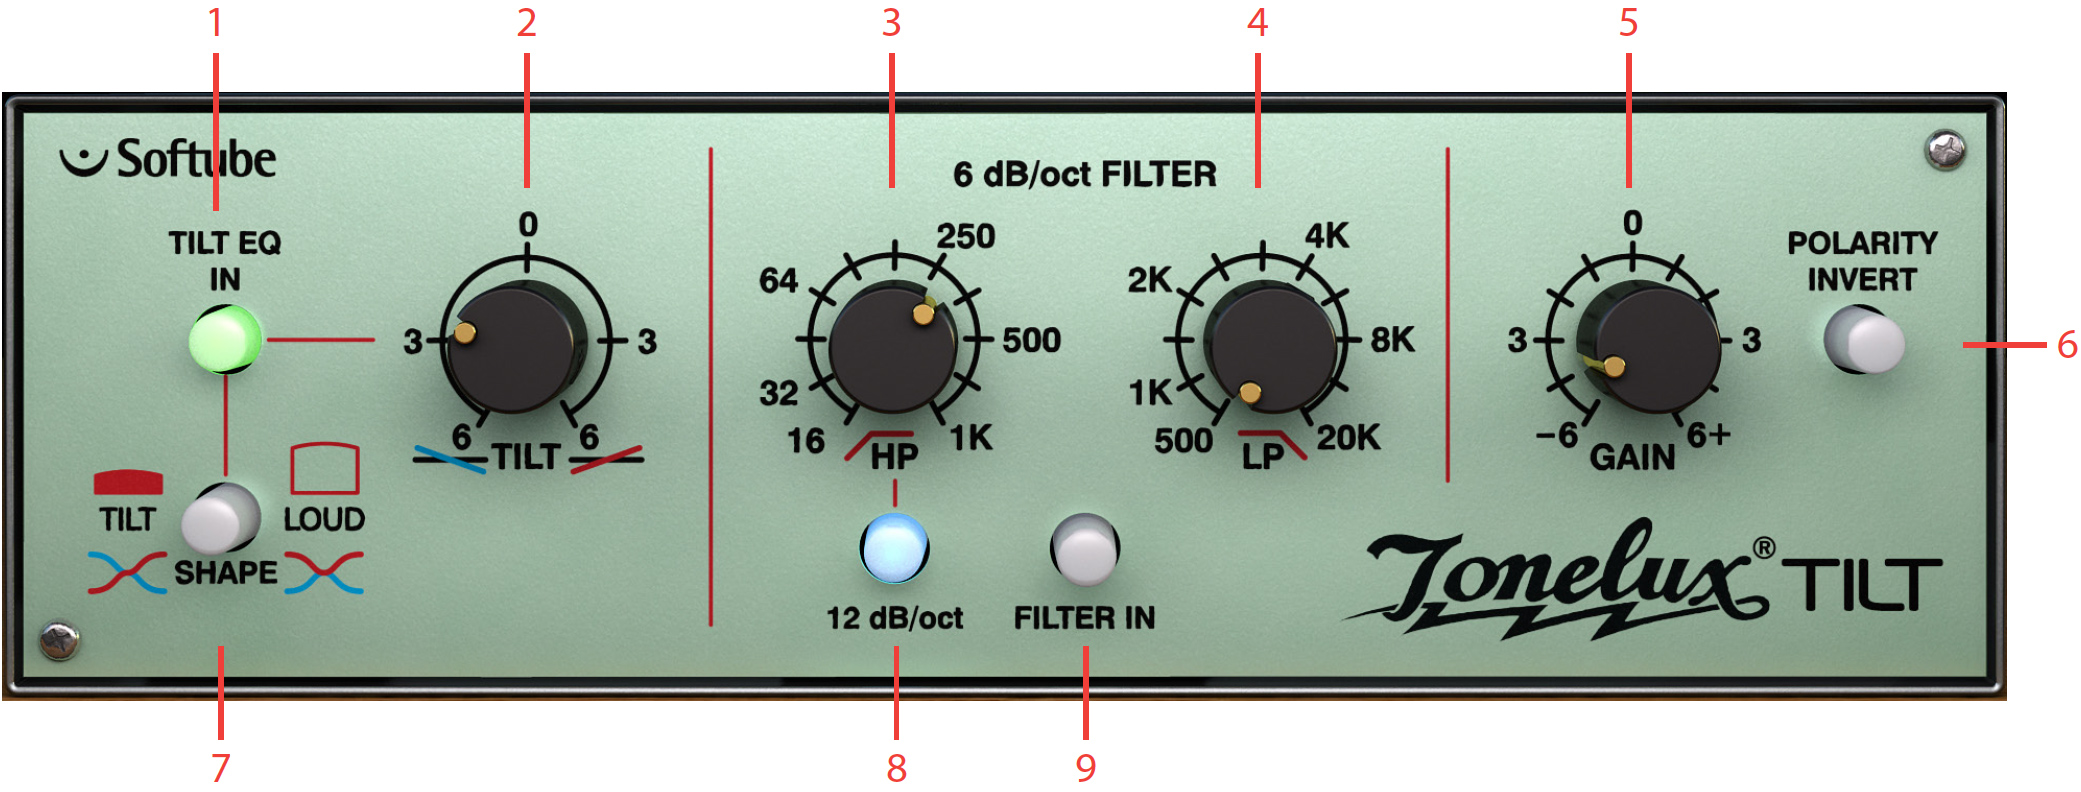
- Tilt EQ in
- Tilt
- High Pass
- Low Pass
- Output gain
- Phase invert
- Shape Tilt/Loud Select
- 12 dB/oct Select
- Filter in
The TILT is all about getting the sound you want fast and easy. The interface is made up of three sections which will give you flexible and powerful control of your sound.
First section: Tilt Eq In, Shape and Tilt.
Second section: High Pass, Low Pass, 12 dB/oct and Filter In.
Third section: Gain and Polarity Invert.
Want to do a fast mix? Try inserting a TILT on each track of your mix and you’ll find that often the Tilt knob is the only EQ you’ll need.
Tilt Section
The Tilt section consists of Tilt Eq In, which engages the Tilt/Loud equalizer, the Shape switch, which lets you select between a Tilt style equalizer or a Loudness equalizer, and finally the Tilt knob, with which you adjust the amount of the equalization
When using the Tilt knob less is more! Remember that when for example cutting high frequencies, the perception can be that you’re boosting low frequencies. Thus you will have double effect when turning the Tilt knob.
Tilt Equalization
The Tilt control rebalances the whole sound of a track with just one twist of a knob, going from a bright and shimmering top to a warm and wide low-end.
The filter of the Tilt is shaped so when one end of the frequency spectrum goes down, the other end goes up, thus cutting frequencies in one end while boosting in the other. The center frequency of this equalizer has been carefully selected to work on a wide range of material and provides a safe way of altering your sound without it getting too harsh or too boomy. The gain of the filter goes from 0 to 6 dB.
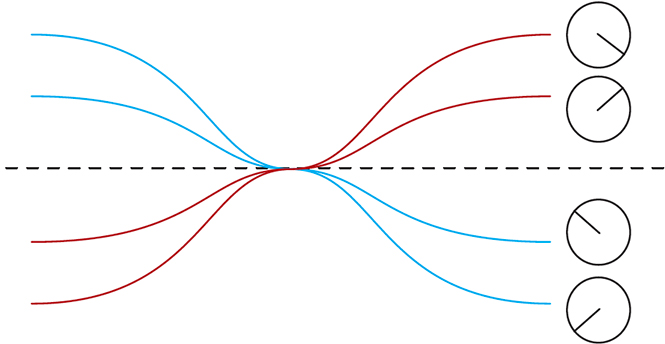
In Tilt shape mode and the Tilt knob fully clock-wise (at 4 o’clock), you will get a high frequency boost and a low frequency cut.
Loudness Equalization
By pressing the Shape button, making it unlit, the function of the Tilt knob is changed from TILT to LOUD. The LOUD setting changes the shape of the filter to that of a loudness control, meaning that when you turn the Tilt knob clockwise you will get more bass and more treble and turning it counterclockwise will give you less of both.
Turning the Loud control from min to max can give the illusion of a sound going from far away to up close. This is a handy effect for post production.
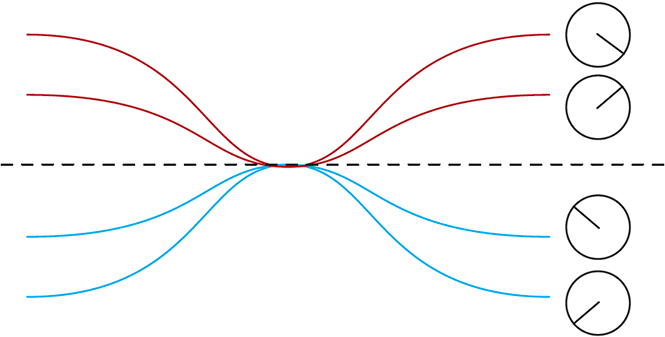
In Loud shape mode and the Tilt knob fully clock-wise (at 4 o’clock), you will boost both high and low frequencies.
The EQ In button will engage or disengage the Tilt/ Loud filter making A/B comparisons easy.
Try using the Loud filter with different settings on different sounds that needs to be separated. For example, imagine a guitar track and drum track getting in the way of each other. Boost the Loud filter on the drums and cut it on the guitar will place the two in the mix with less clashing frequencies.
Filter Section
The filter section with its two filters will further shape the sound or help you get rid of problematic frequencies in a track. The Low Pass filter cut-off frequency goes from 16 Hz to 1 kHz and will attenuate the signal 6dB per octave. When the 12 dB/Oct switch is engaged the signal will be attenuated 12 dB per octave.
The High Pass filter cut-off frequency goes from 20 kHz to 500 Hz and is set to attenuate the signal 6 dB per octave.
By engaging/disengaging the Filter In button the HP and LP filters will be enabled or in bypass respectively.
Output Section
Depending on what version of the TILT you are running, the TILT or TILT LIVE, the knob in the output section will be either a Gain control (TILT) or a Boost Ceiling control (TILT LIVE). The Boost Ceiling is explained below in the TILT LIVE section.
The Gain control is a standard make up gain going from -6 dB to +6 dB.
The Polarity Invert button inverts the phase when pressed (lit up).
The Tilt Live plug-in is optimized for the Avid Venue system and contains features requested by live sound engineers. The Tilt Live version does not include the transformer modeling to preserve DSP power and features the Boost Ceiling control.
The TILT LIVE is perfect for in-ear systems when you want to tweak the mix to adjust for ear fatigue, without changing the actual volume of the mix.
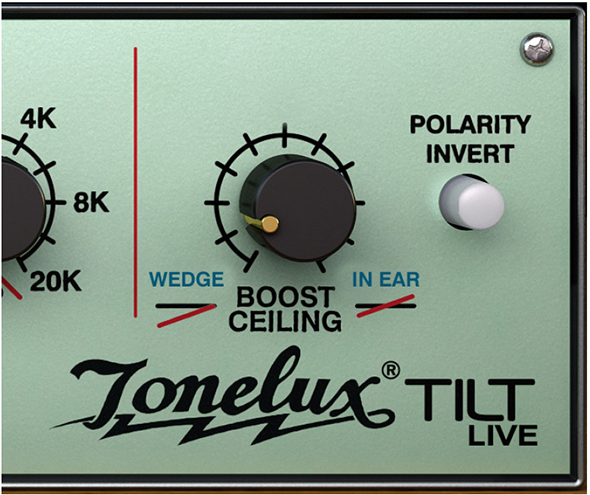
In normal operating mode (Boost Ceiling on full), the filters in the Tilt/Loud circuit will attenuate some frequencies while boosting others, just like the normal TILT plug-in. For live performance purposes this can be a drawback, since boosting frequencies can sometimes cause feedback in a live monitoring system.
By setting the Boost Ceiling on min, you have limited the amount of boost to 0 dB, ie., no boost at all. Whatever setting you put on the TILT LIVE plug-in, it will never boost any frequencies.
For monitor systems on stage the TILT LIVE can help you changing the balance of a mix without having to risk getting feedback from increasing the volume.
Boost Ceiling
When using the TILT LIVE the Gain control will be replaced with a Boost Ceiling control.
The Boost Ceiling control makes the Tilt filter behave differently depending on the Boost Ceiling setting.
When the Boost Ceiling is at its minimum the audio level will never be amplified. The filters will have the same shape but will always be below 0 dB.
When the Boost Ceiling is set to its maximum it will work as the ordinary TILT. When set between, there will be some boosting of frequencies, but never more than you dialed in.
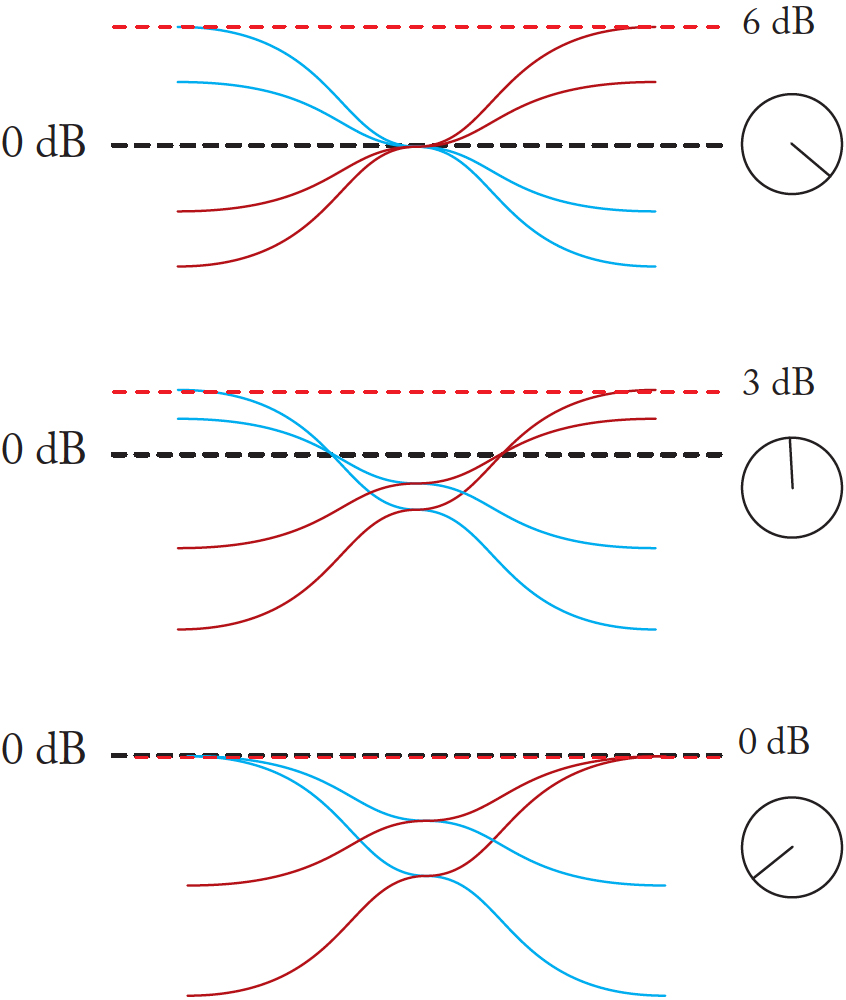
Tilt filter curves for different settings of the Boost Ceiling knob. Top: Boost Ceiling at “In Ear” setting (6 dB), middle: 3 dB, and bottom 0 dB (“Wedge” setting)
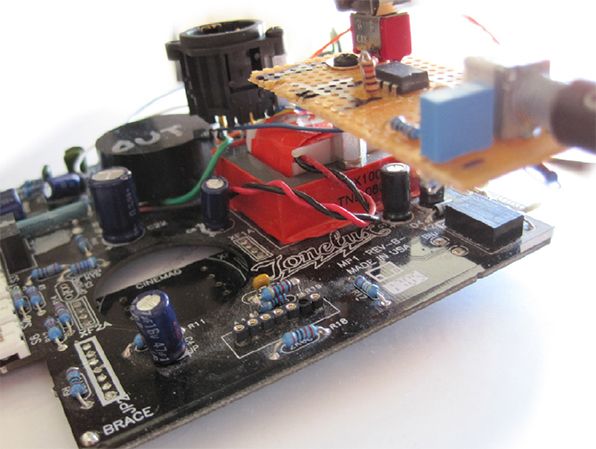
The TILT and TILT LIVE plug-ins aren’t based on a single piece of hardware. Designer Paul Wolff wanted to create some extra functionality for the plug-in version of his Tilt module, and worked night and day to design a hardware prototype that is the basis of these two plugins. However, if you are desperate to find the Tilt control in a hardware package, we can strongly recommend the fantastic sounding Tonelux MP1a mic preamp module.
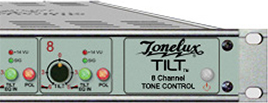
Here you can see the eight channel Tilt unit by Tonelux, and below is a photo of the prototype Paul Wolff sent us. It looks like, well, a prototype, but sounds fantastic!
Tonelux Tilt and Tilt Live for Amp Room
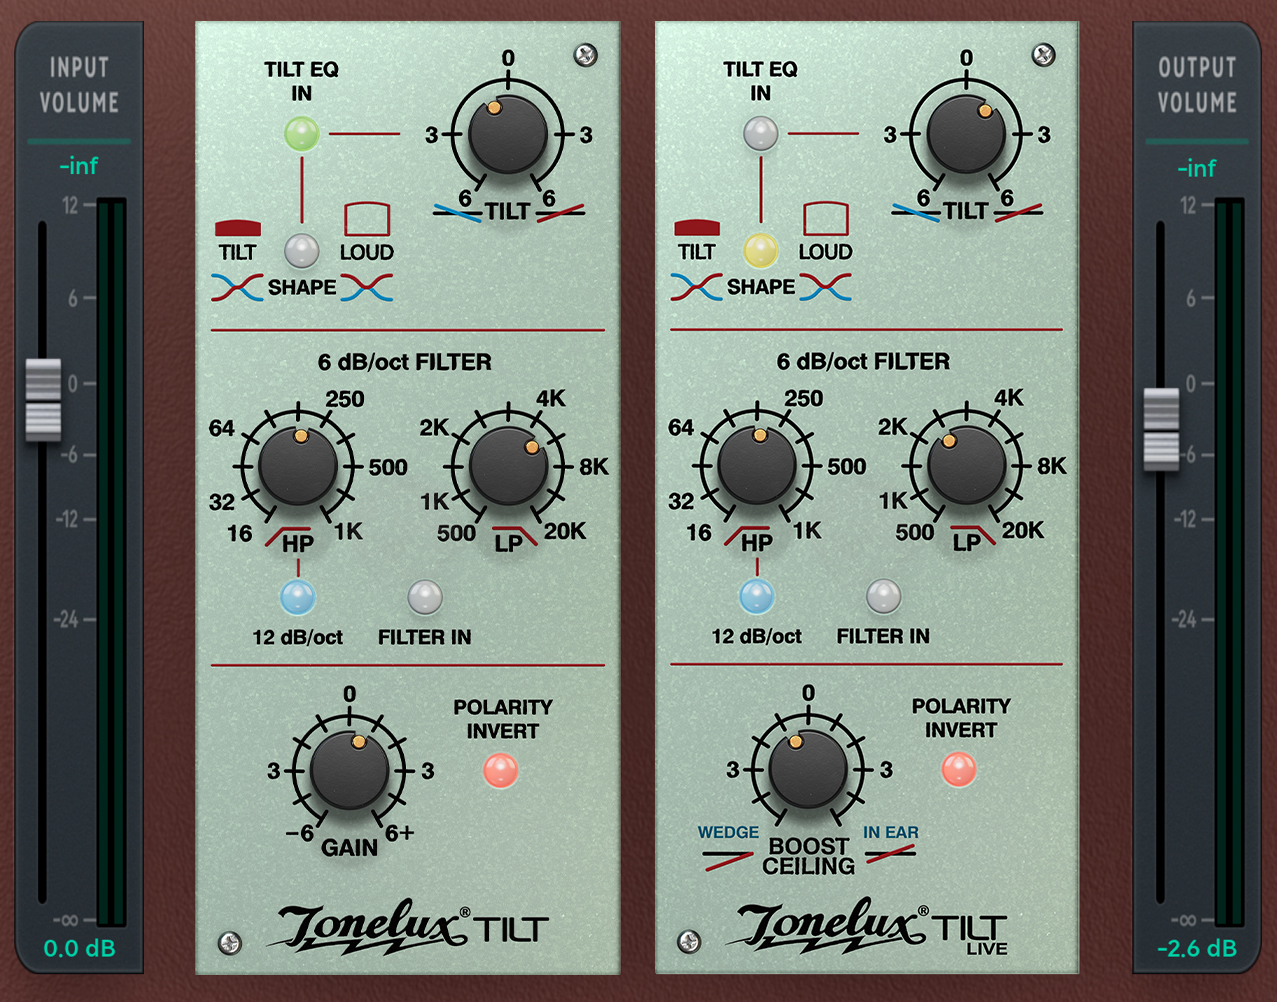
When purchasing this product, you automatically gain access to running the Tonelux Tilt and the Tonelux Tilt Live as modules inside the Amp Room platform. The modules can be matched and arranged together with any other native Amp Room module or other Amp Room-ready modules that you might own.
A whole range of added control can be accessed with Extended Features. Please see the separate "Extended Features" manual for more information.
Niklas Odelholm – Modeling
Oscar Öberg – DSP programming
Torsten Gatu – Framework programming
Arvid Rosén – Framework programming
Ulf Ekelöf – 3D rendering. Original hardware was designed by Paul Wolff at Tonelux.